
How to access Google Analytics dashboard data via API with an access token.
Prerequisites:
Create an account in the Google Cloud platform using the link https://console.cloud.google.com/.
Create an account in Google Analytics by following this link https://analytics.google.com/
If you want to access your Google Analytics data, generally you navigate to your dashboard and search for the metric and then analyze the data. But if you want to fetch the data through the API you need to generate an access token.
To get an access token, we have to create an OAuth application. That is used to authorize the user who is going to fetch the data from the Google Analytics account. For this, firstly, we need to create a Google Cloud project. And then using the credentials, we have to authorize our Google Analytics account and we will get an access token.
Using the access token only we can fetch the data through the API. Let’s see how to create a Google Cloud project.
Steps to creating a project in Google Cloud Console:
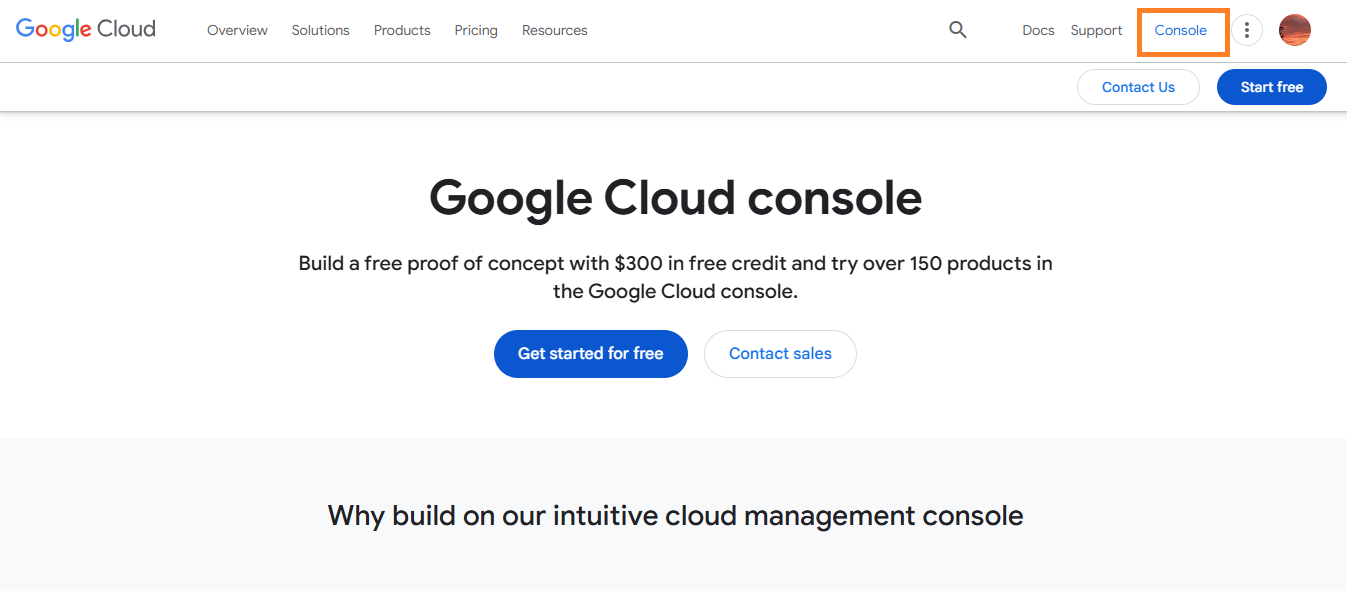
Step 1: Go to the console section in the cloud dashboard in the top right corner.
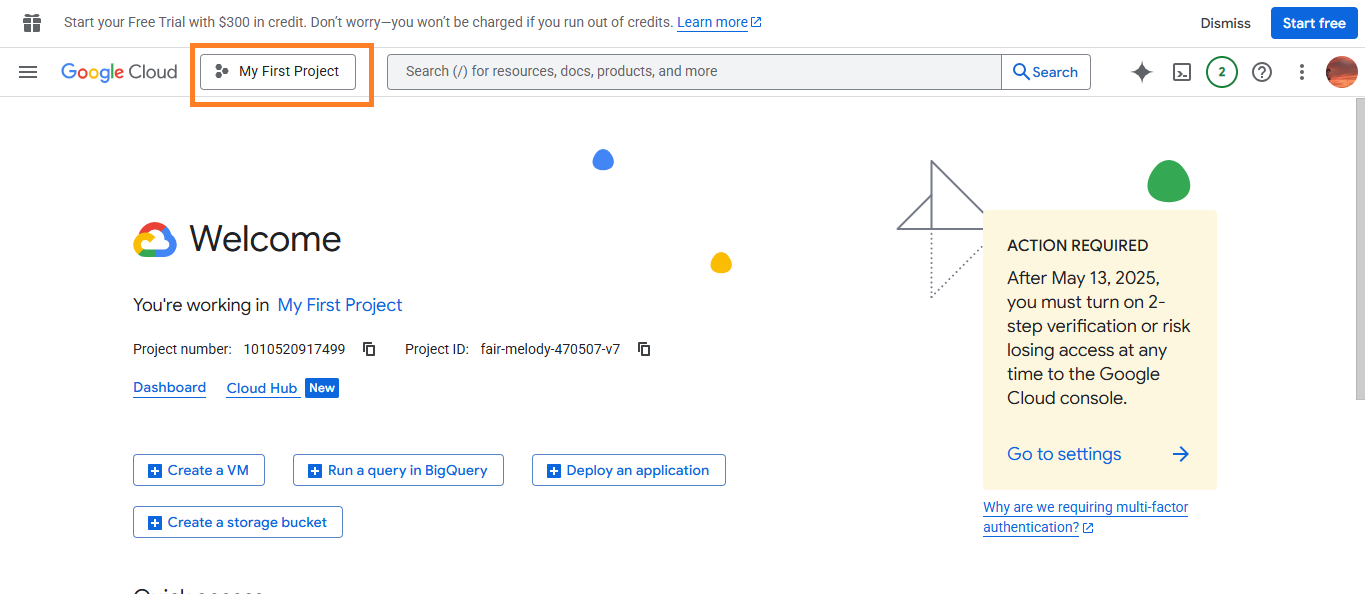
Step 2: Select the “My First Project” button.
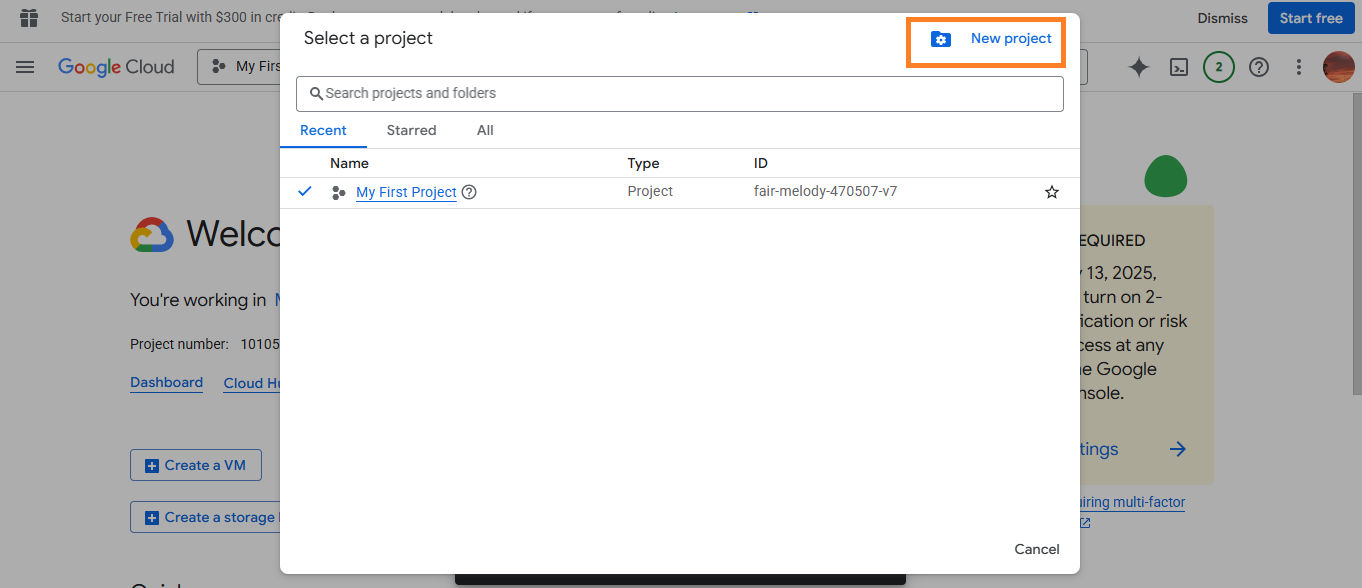
Step 3: If you don’t have any projects, then click the “New project” button in the top right corner or you can also select your existing project.
Step 4: Enter the project name and organization, and then click the “create” button.
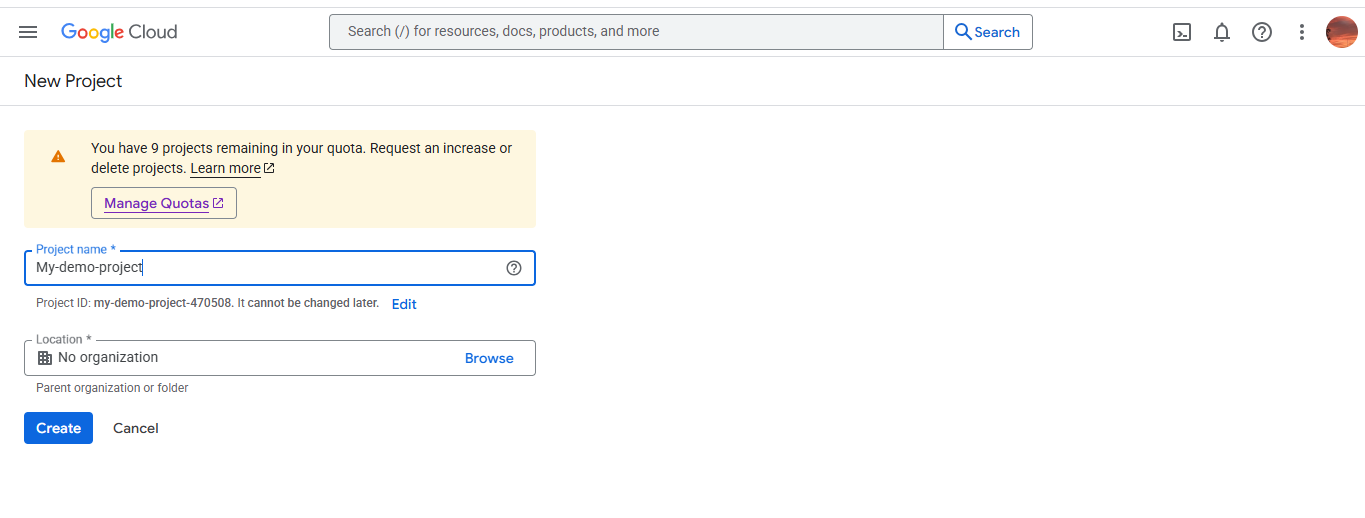
Step 5: The Google Cloud Console project has been successfully created.
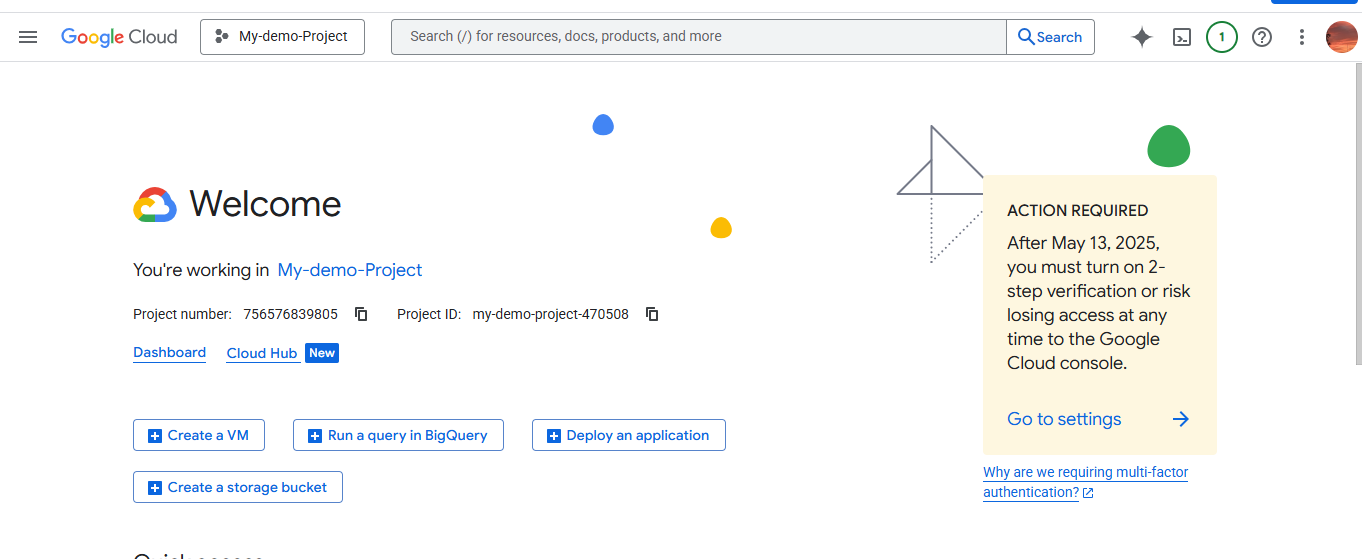
Here, we created a project. Then we are going to create credentials for the OAuth process.
OAuth Methods
For creating OAuth, there will be two methods.
Service Account (Server to server)
User OAuth (OAuth 2.0)
We can get access tokens from both. Depending on your needs, you can choose which method is going to work for your case. I’ll explain about two methods, don’t worry.
Service Account Credentials | User OAuth (OAuth 2.0) |
|---|---|
No refresh token. Access token never expires | Access tokens expire after every hour. Regenerate using |
You have to add the email which is present in the | Any live user can get access via OAuth. |
Method 1: Access token generation via service account
If you are using the service account there is no refresh token mechanism. I mean, your access token never expires until you manually revoke it. Follow the below steps to create a service account and credentials for generating access token.
Step 1: Create a service account in GCC
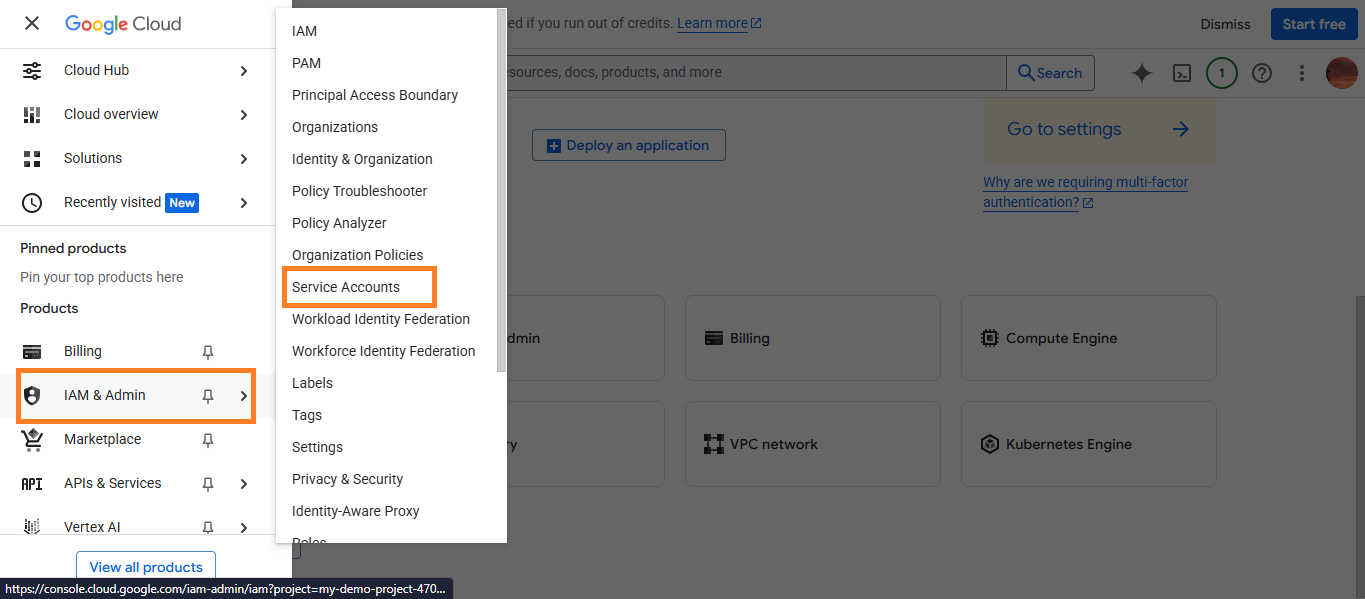
Navigate to the menu from the top left corner, then click IAM & Admin → Service account.
Then click “Create service account.”
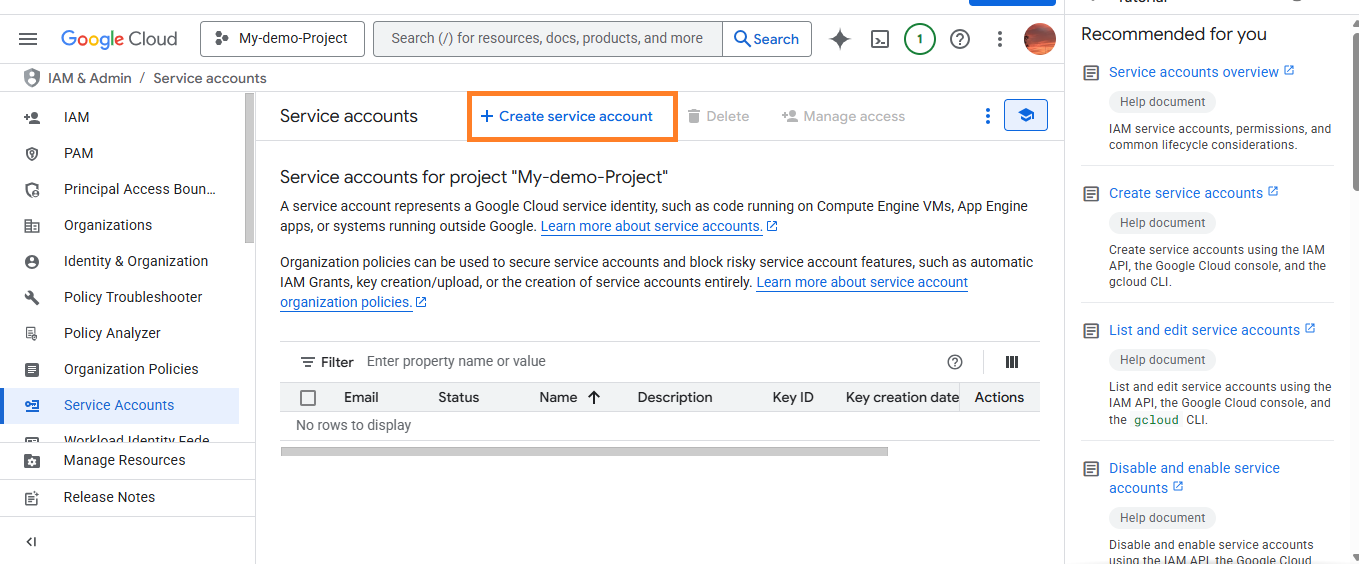
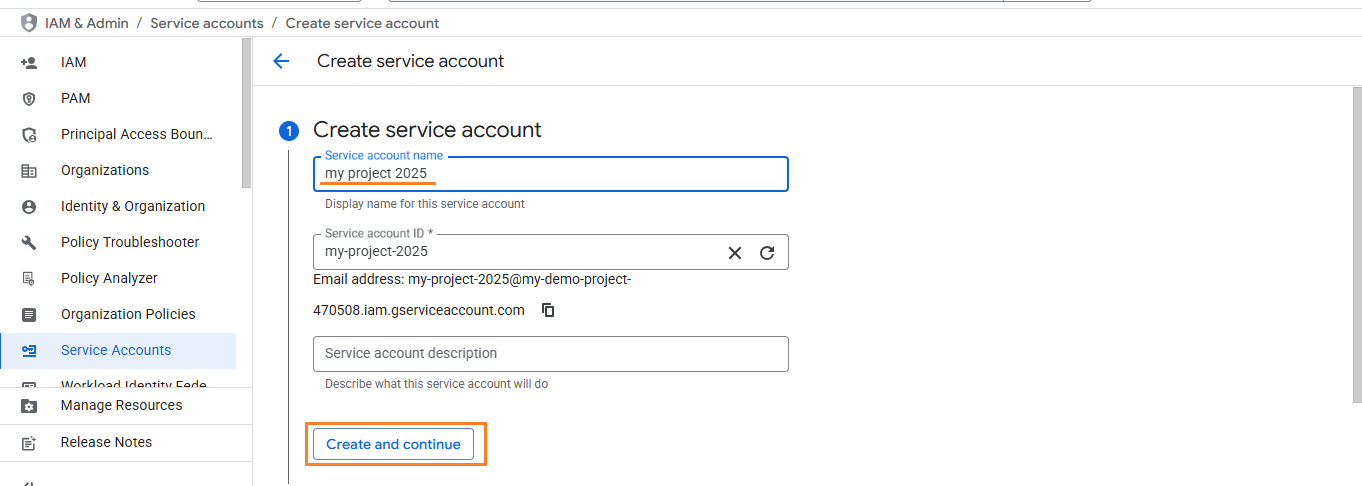
Fill in the essential details, service account name, and description (optional). The service account ID will automatically generate.
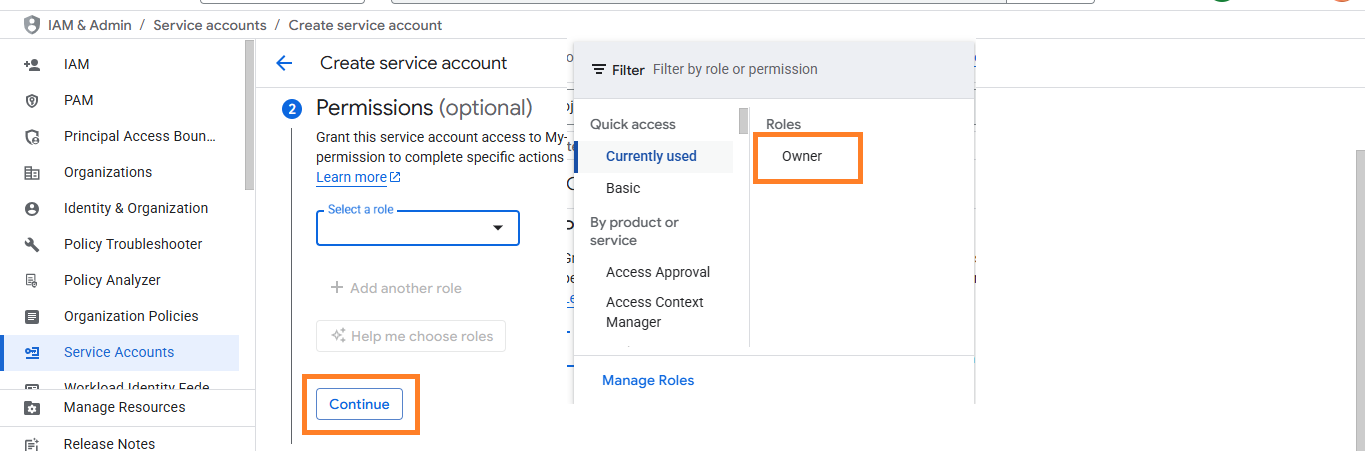
Then select a role.
If you want full access, then choose ‘owner’ as the role and click ‘Continue.’
You can add multiple roles.
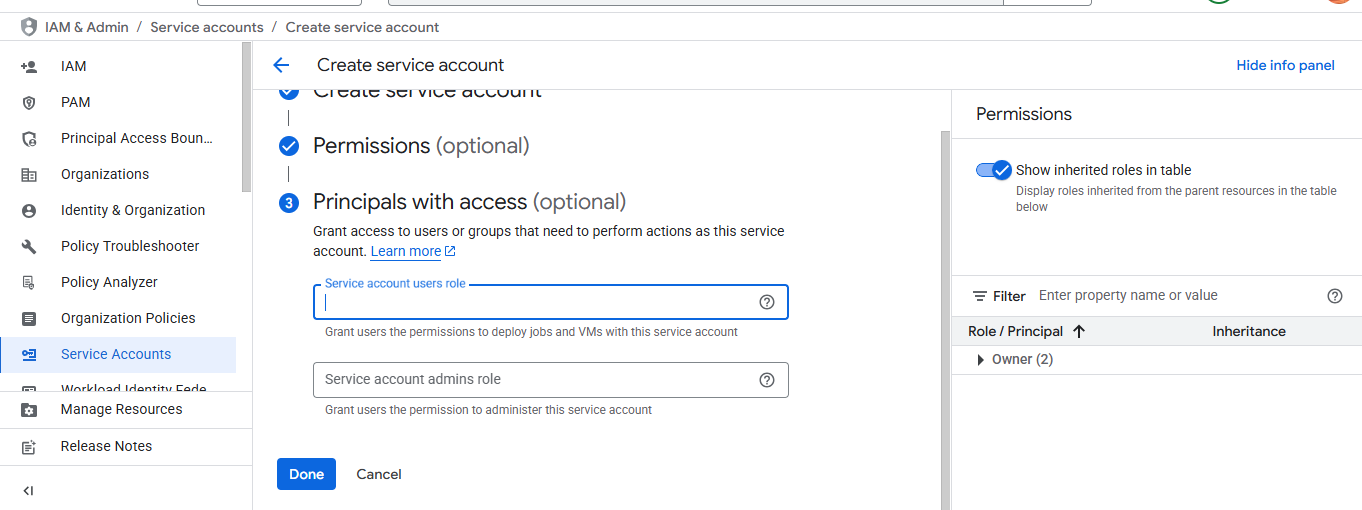
Click the “Done” button. If you want to add the ‘service account users' role’ and ‘service account admin role,’ then you can add them; otherwise, you can skip it.
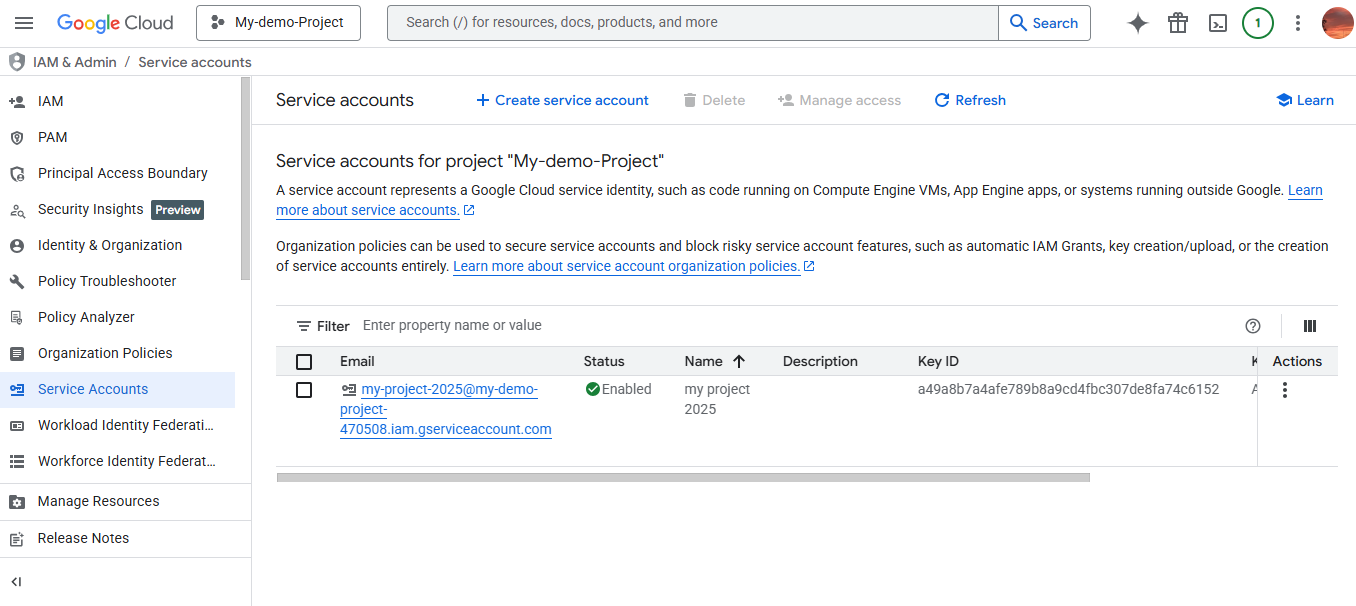
Finally, a service account was created in Google Cloud Console project.
Step 2: Generate a service key for authorization
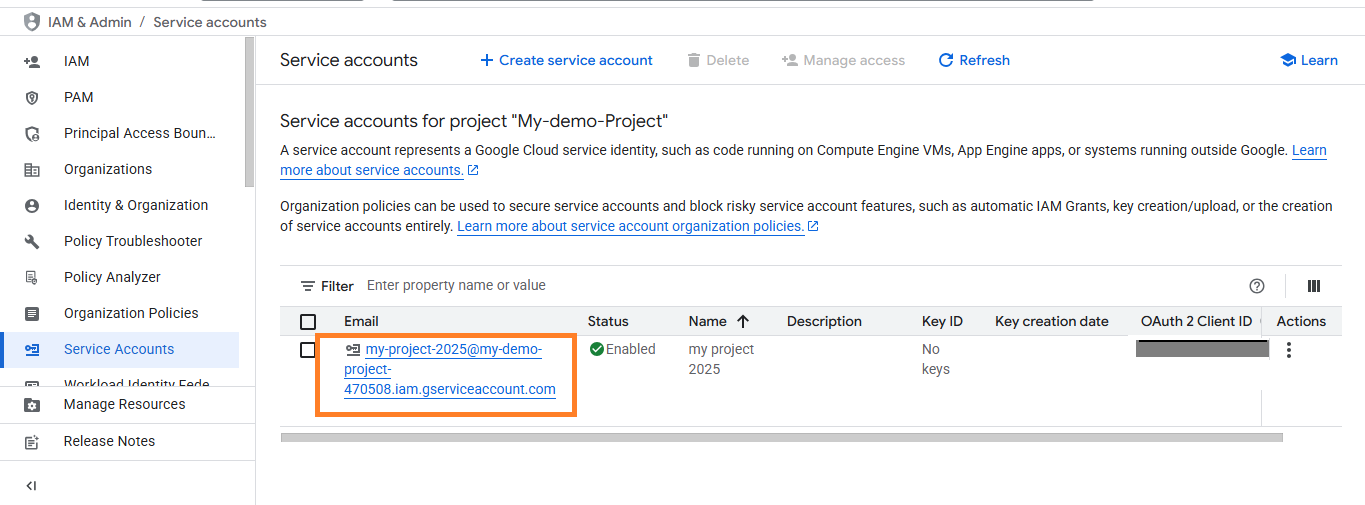
After creating the service account, you need to generate a key. From that key you can get a client email. Just add the email to your GA4 dashboard as a user. Let’s see how to do it.
Click the email created for your service account.
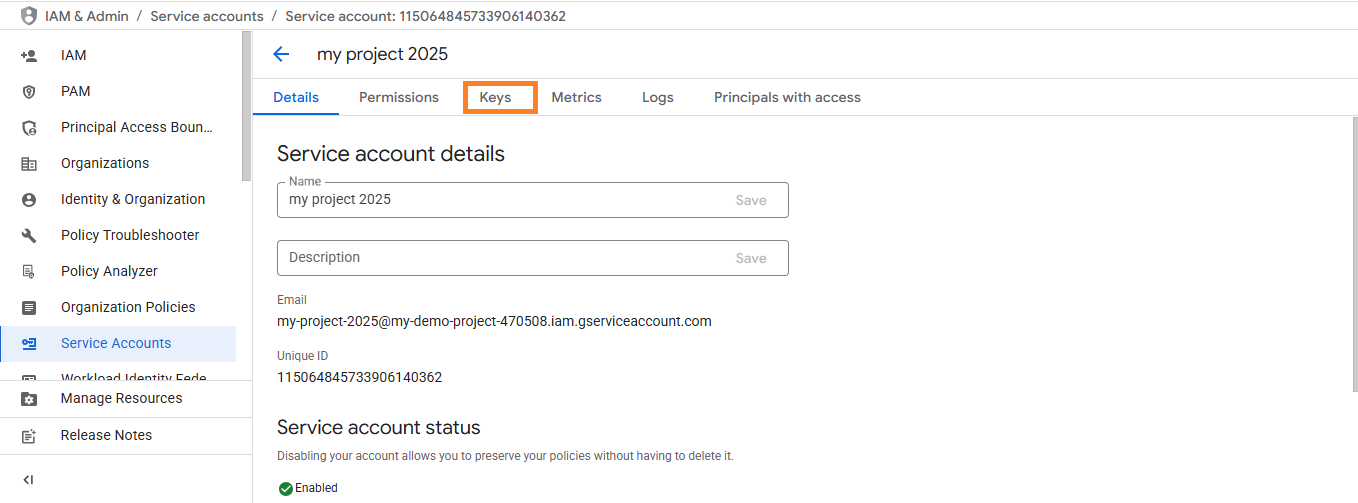
Then click ‘keys.’
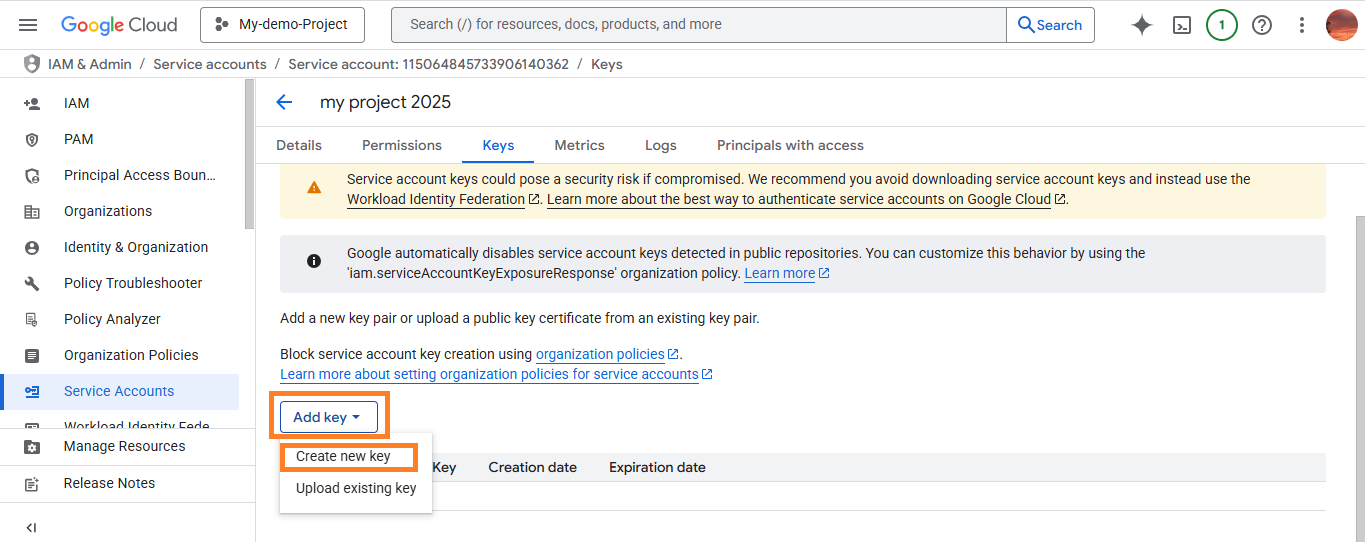
Click the ‘Add Key’ button, then click ‘Create new key.’
Choose a format for downloading your key, but the JSON format is recommended.
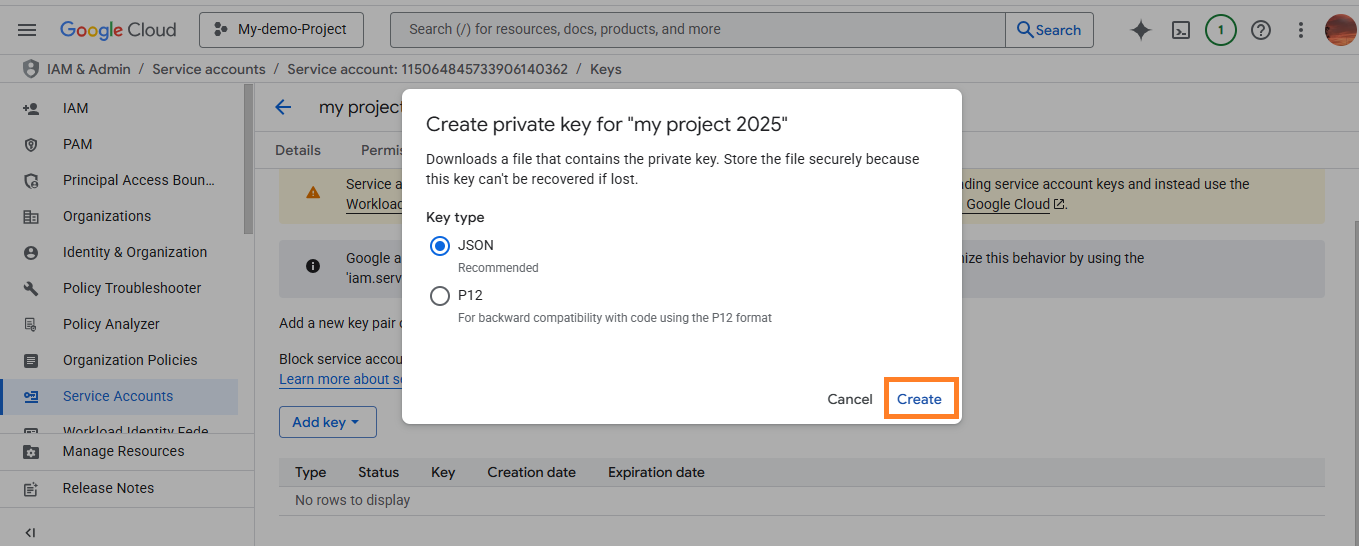
The service key is downloaded in your system. You can store it anywhere; it will be used later for authentication.
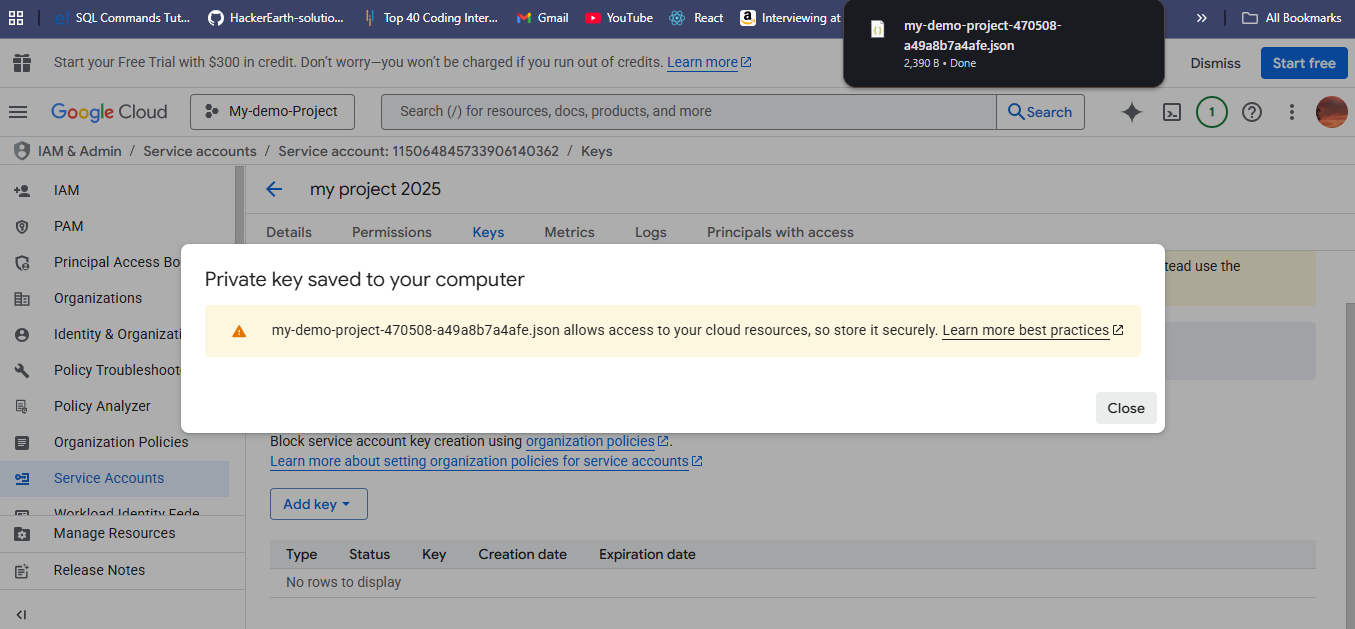
Step 3: Add user to the GA4 dashboard
1. Add the client email from the JSON to the GA4 dashboard as a user. Open the Google Analytics dashboard https://analytics.google.com/ to add a user.
Go to Admin → Account access management.
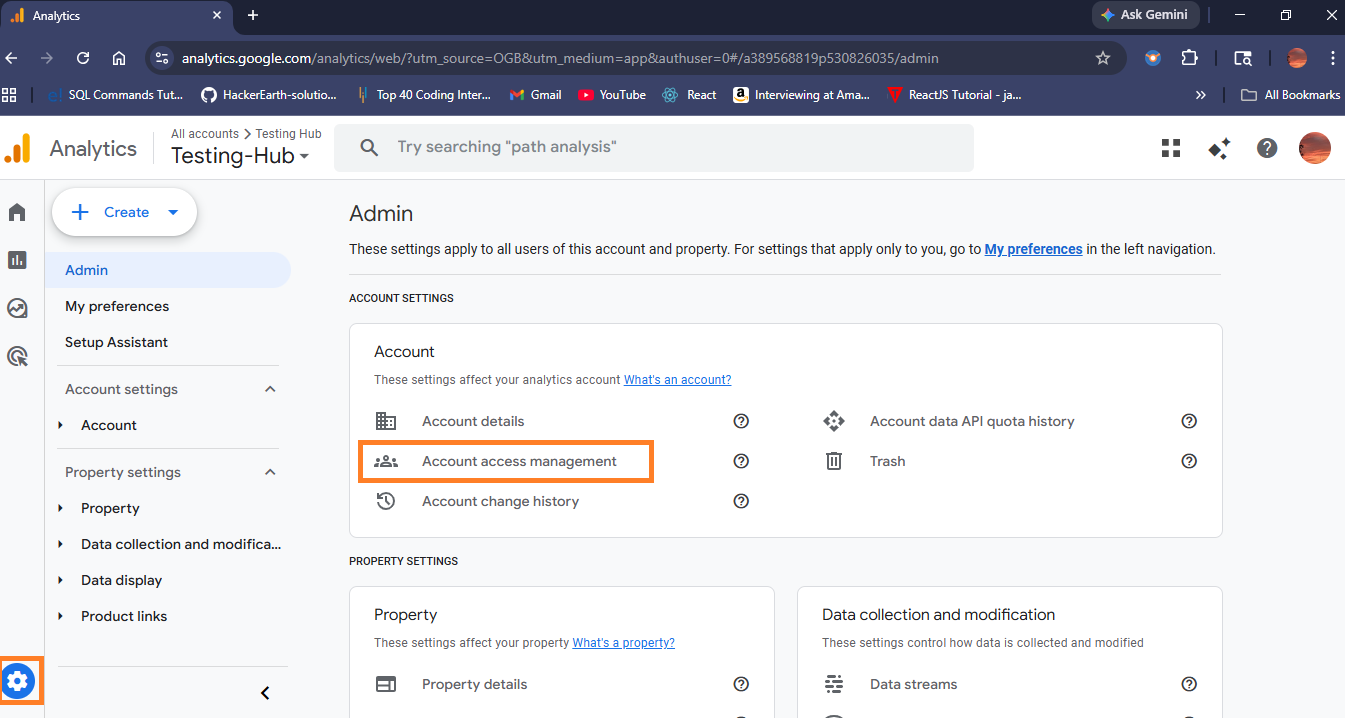
2. Click the “+” icon and click “Add Users”
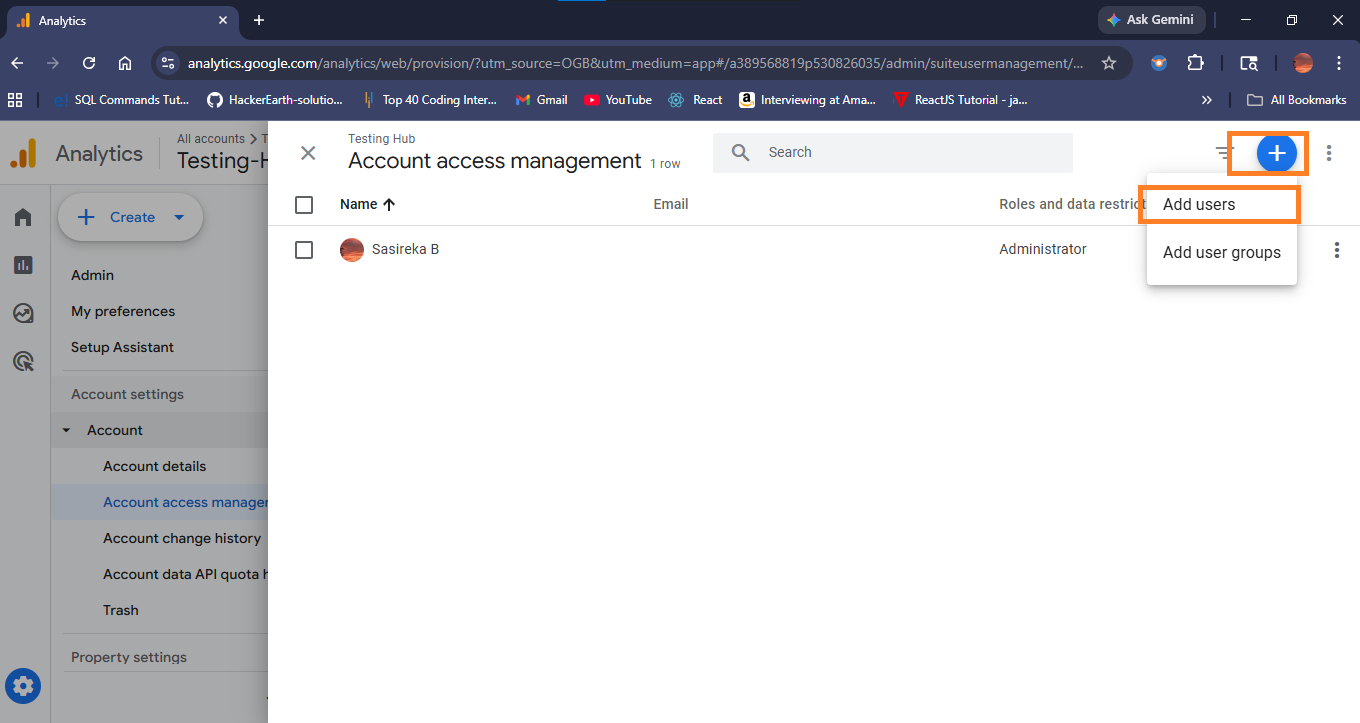
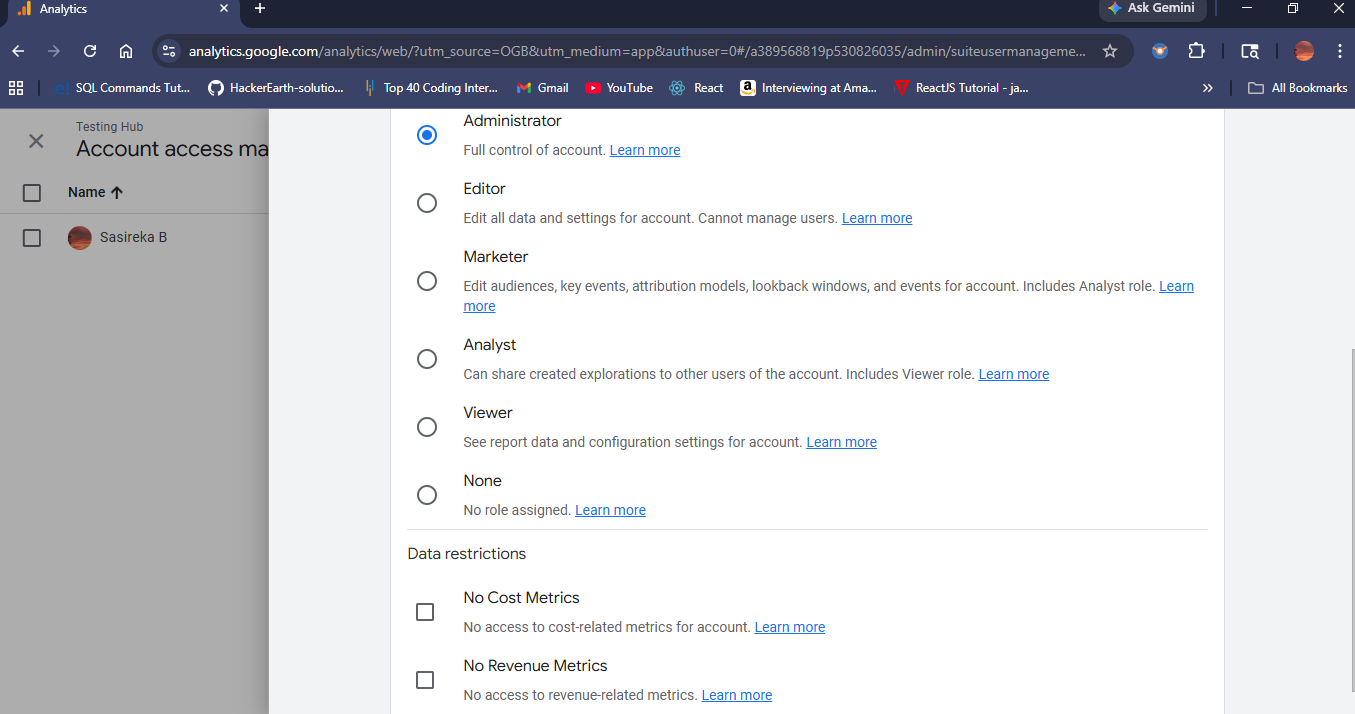
3. Add the client email ID and choose the role you want, then click “Add”. That’s it.
"Viewer” is the basic role.
If you want overall control, then select Administrator.
You can also add restrictions for the user.
Finally, click the ‘Add’ button to complete user creation.
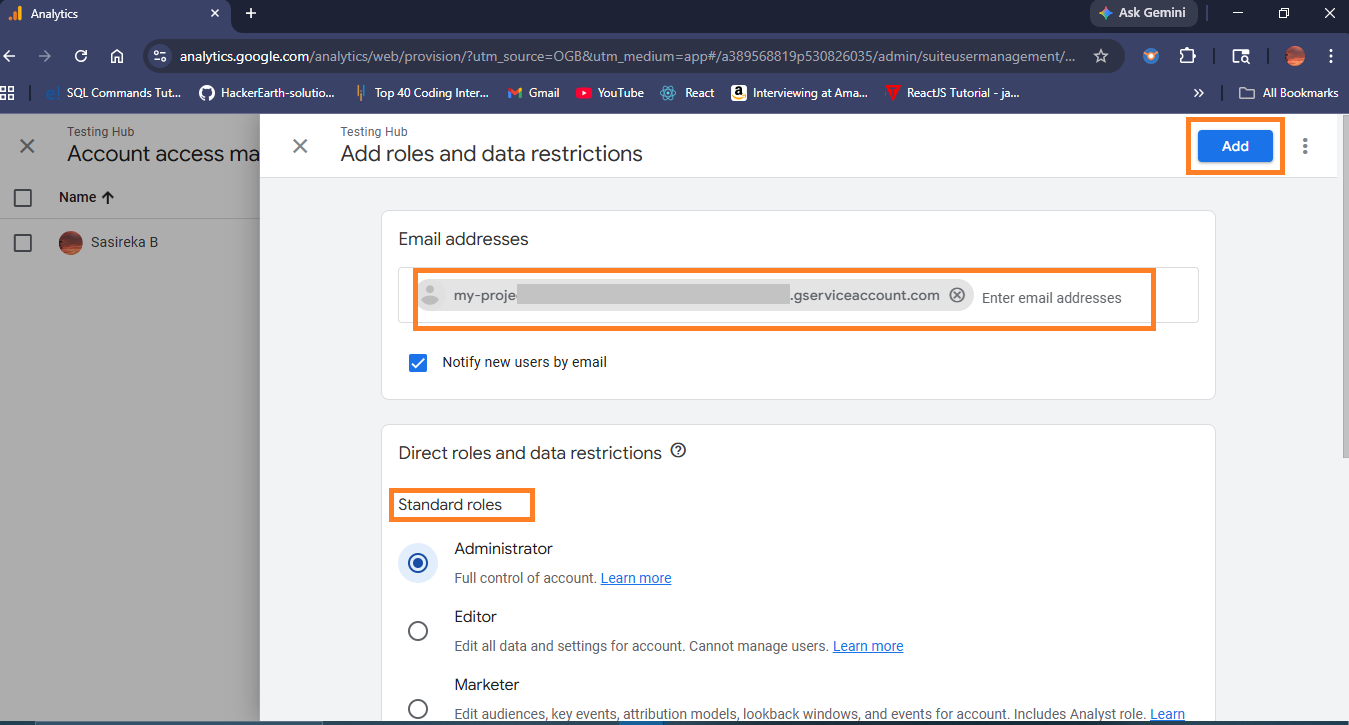
4. User created in Google Cloud Console was added successfully to Google Analytics.
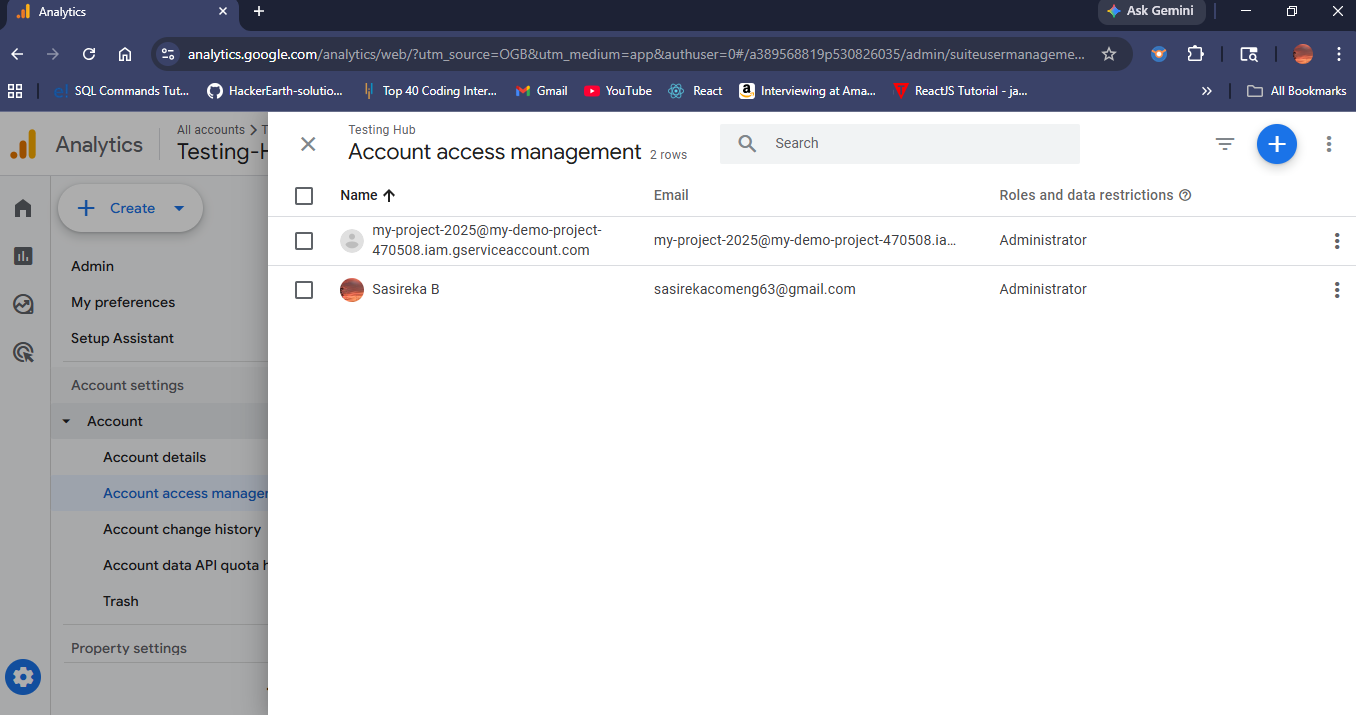
Now the GA4 and GCC service account is integrated successfully. This .json file has some credentials like client email, private key, etc. Using this, you can fetch data through an API. Finally you add email also. Then you can generate an access token using the credential file. Before this, let’s see the second method.
Method 2: Configure the project and create User OAuth
In this method we don’t need to create a service account. Instead, we are going to create a client. So that not only test users but also all live users can use the application credentials. That means using the same client ID and secret, anyone can generate an access token. This method gives access on behalf of a user.
The flow will be
The user logs in and gives permission
Then get a one-time code
Using this code generate an access token and a refresh token
Then access the API using the access token
Let’s see how to create a client.
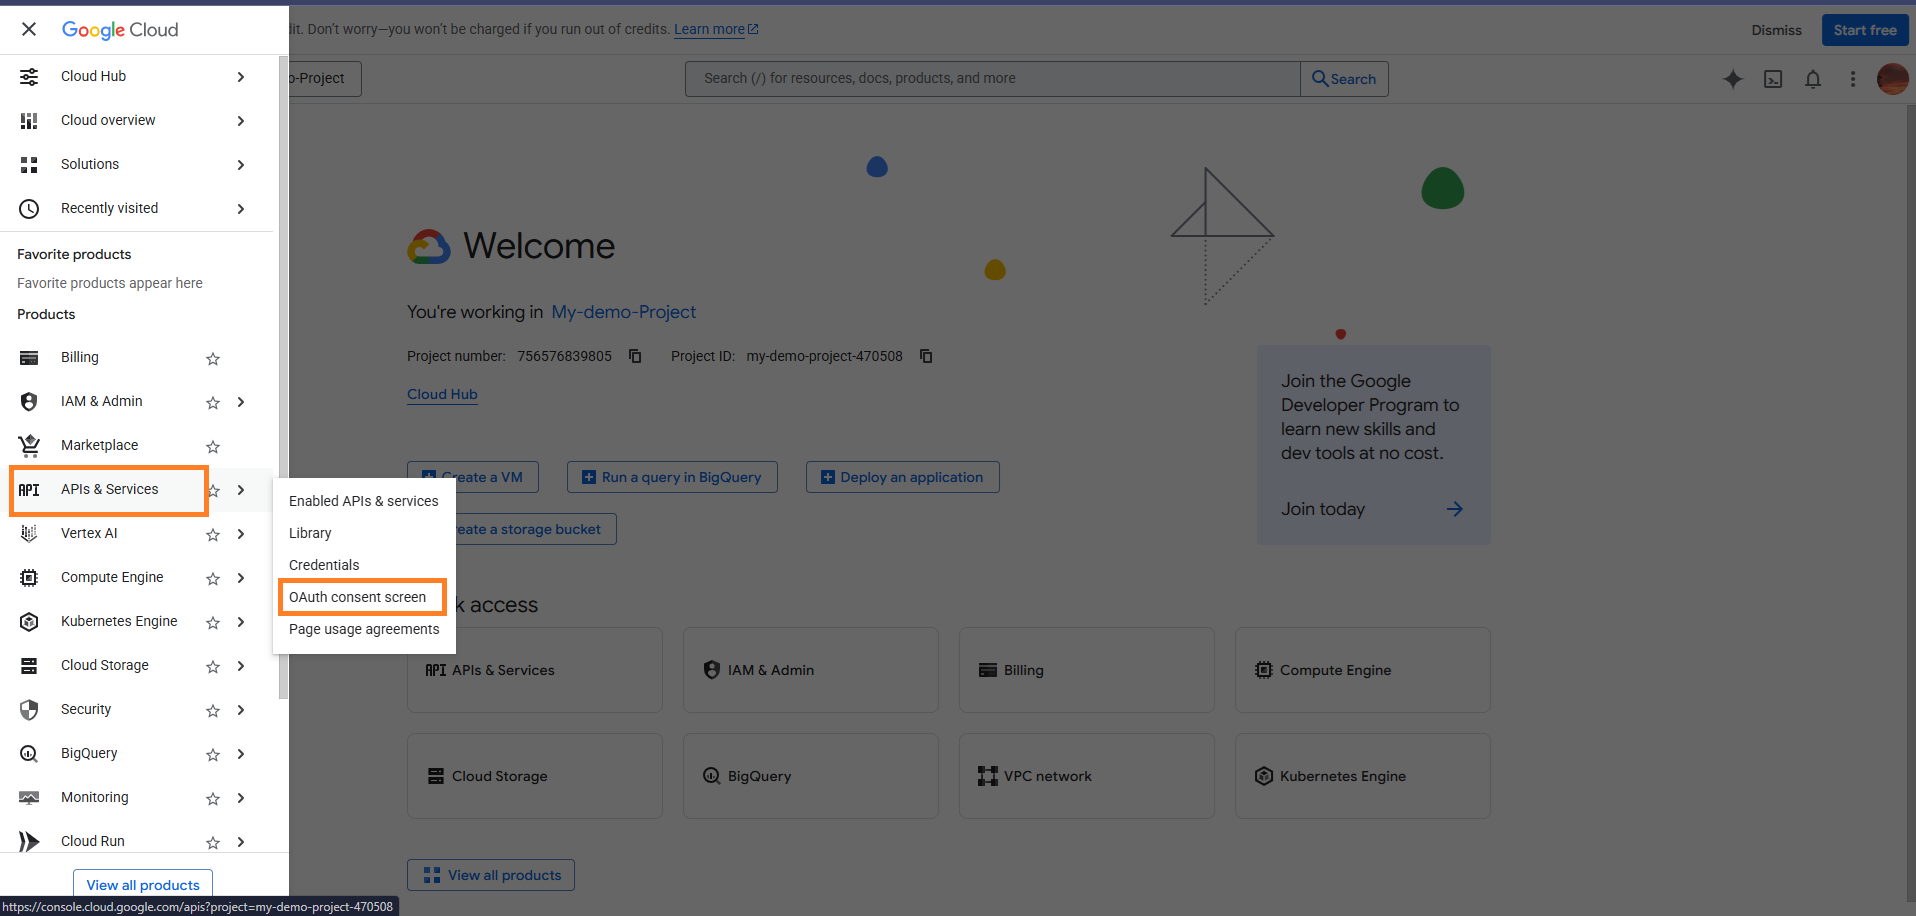
Select “API and Services” → OAuth consent screen
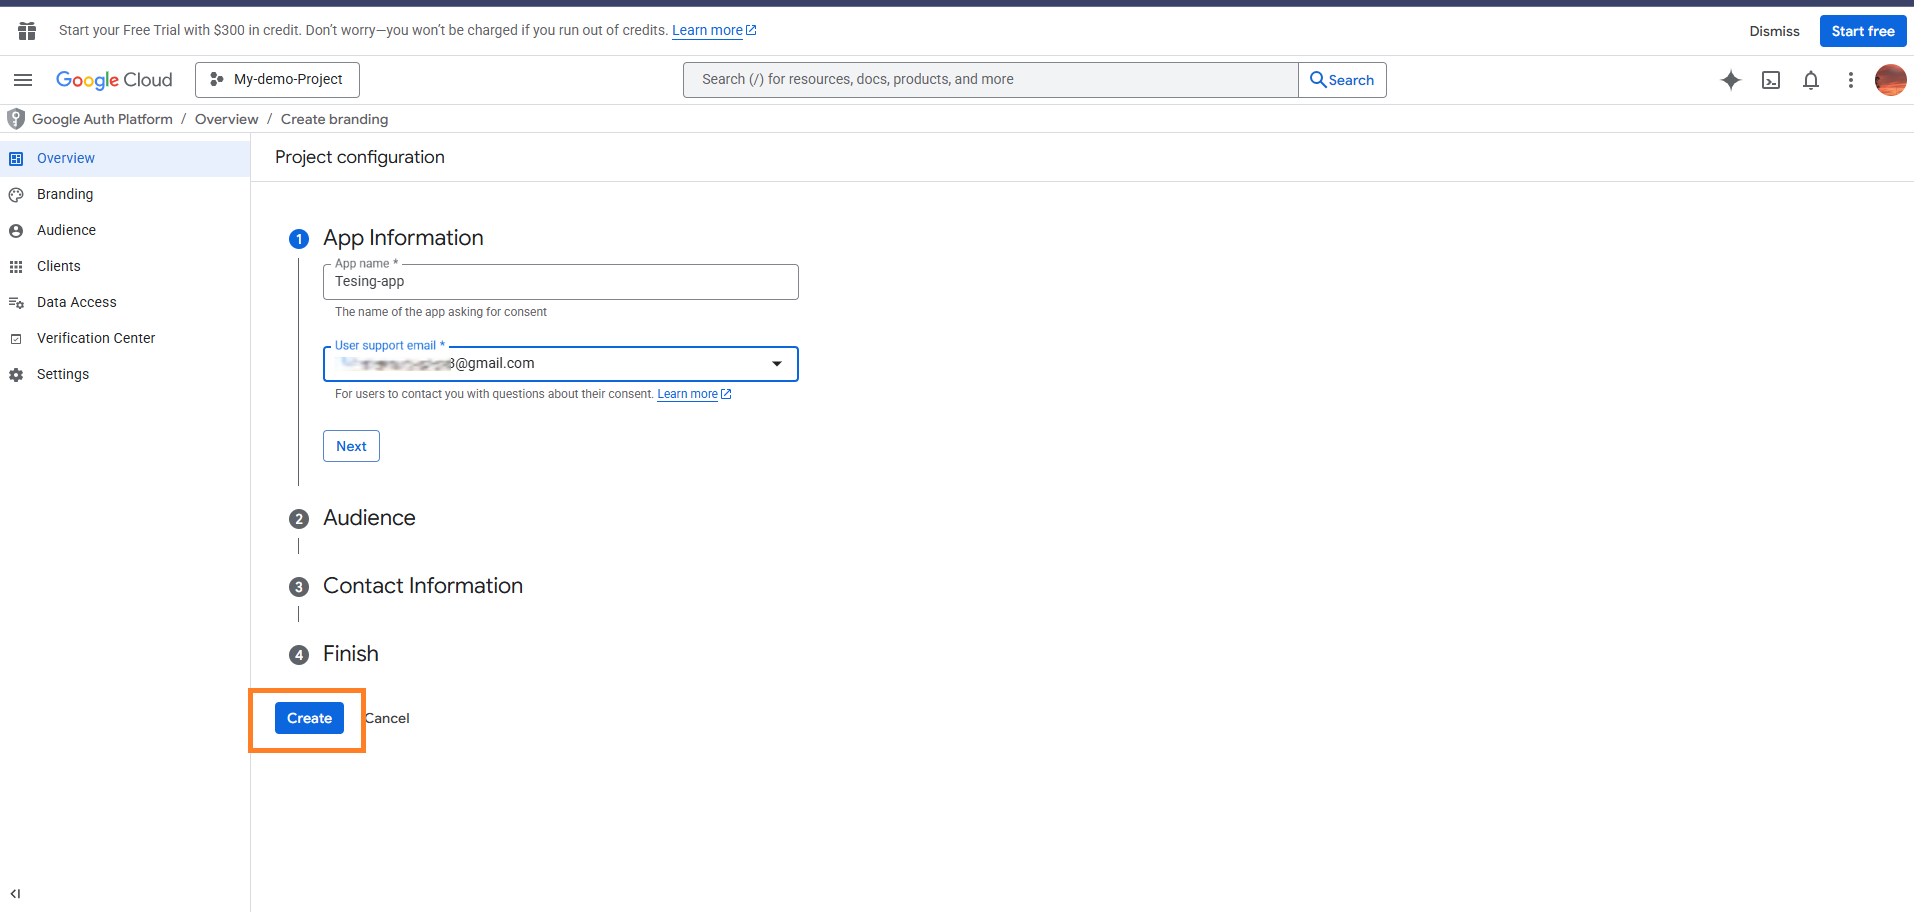
Then select “Clients” and then click “Get Started.”
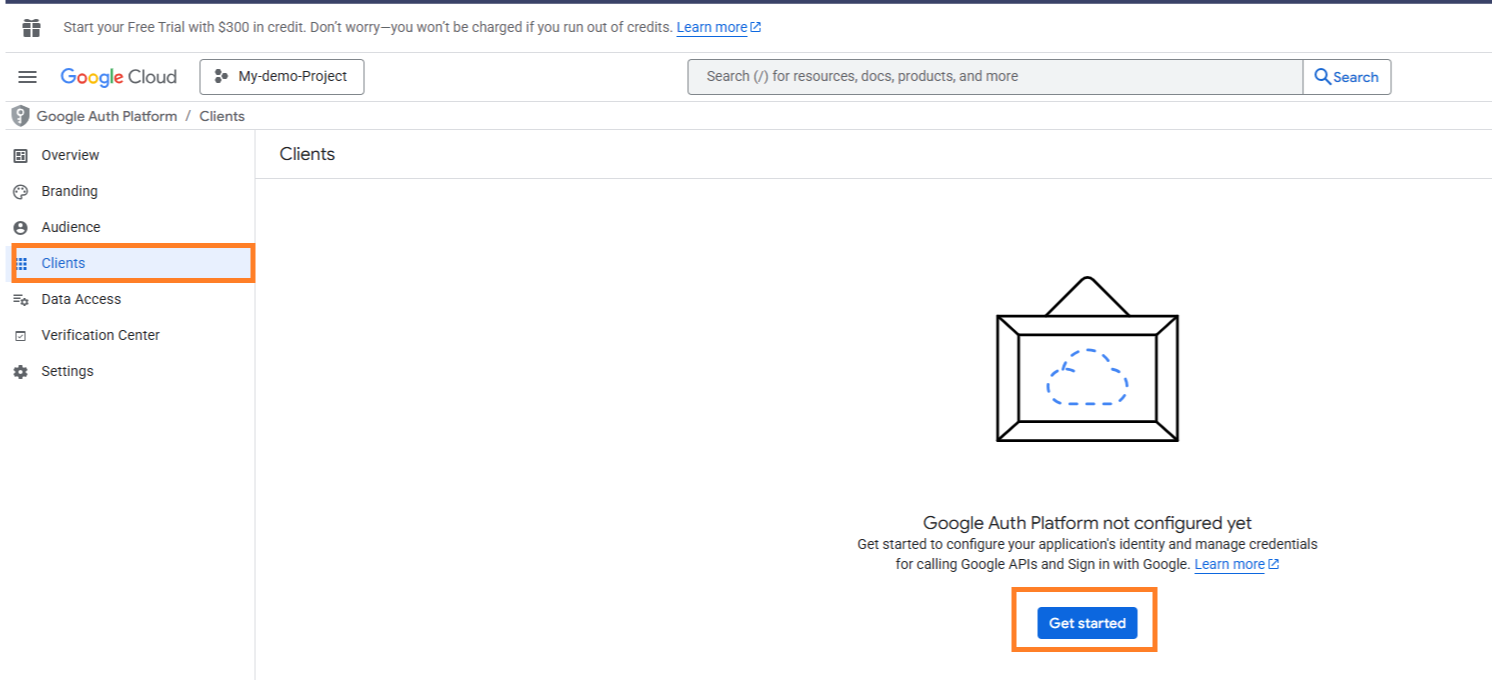
Fill in all the necessary details and click "create" to complete project configuration before creating a client.
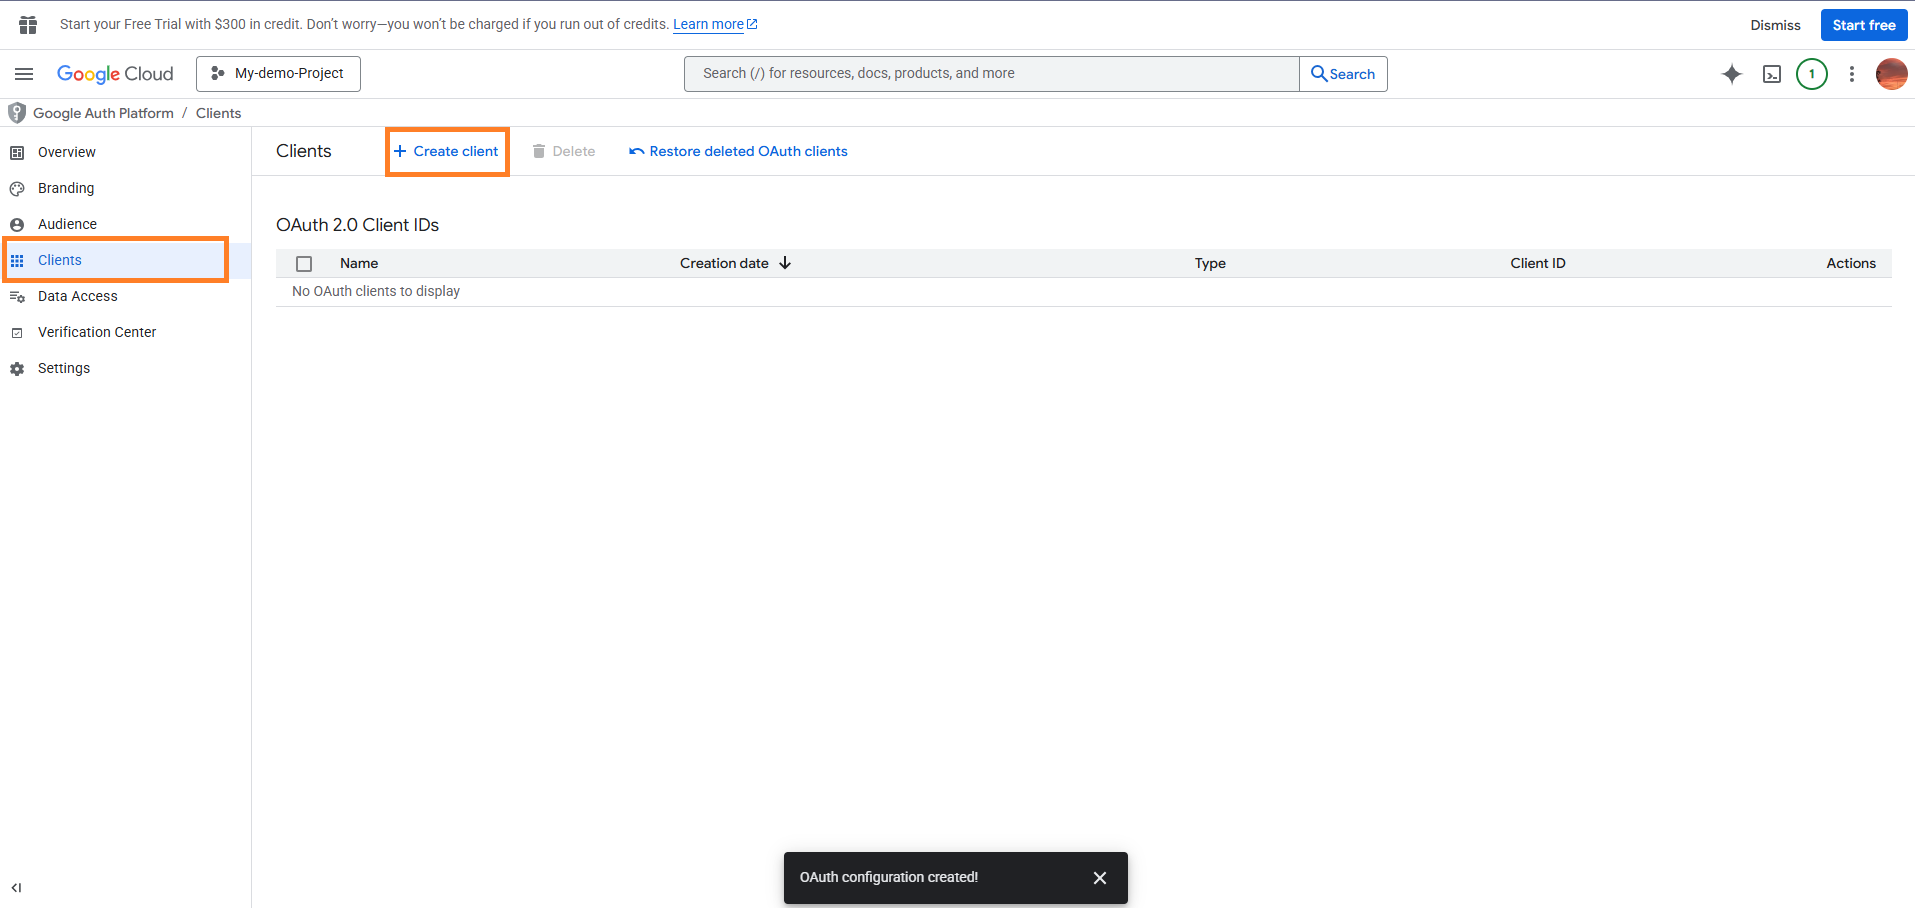
After configuring the project, click “clients” and click “Create client” to generate a client ID and a secret
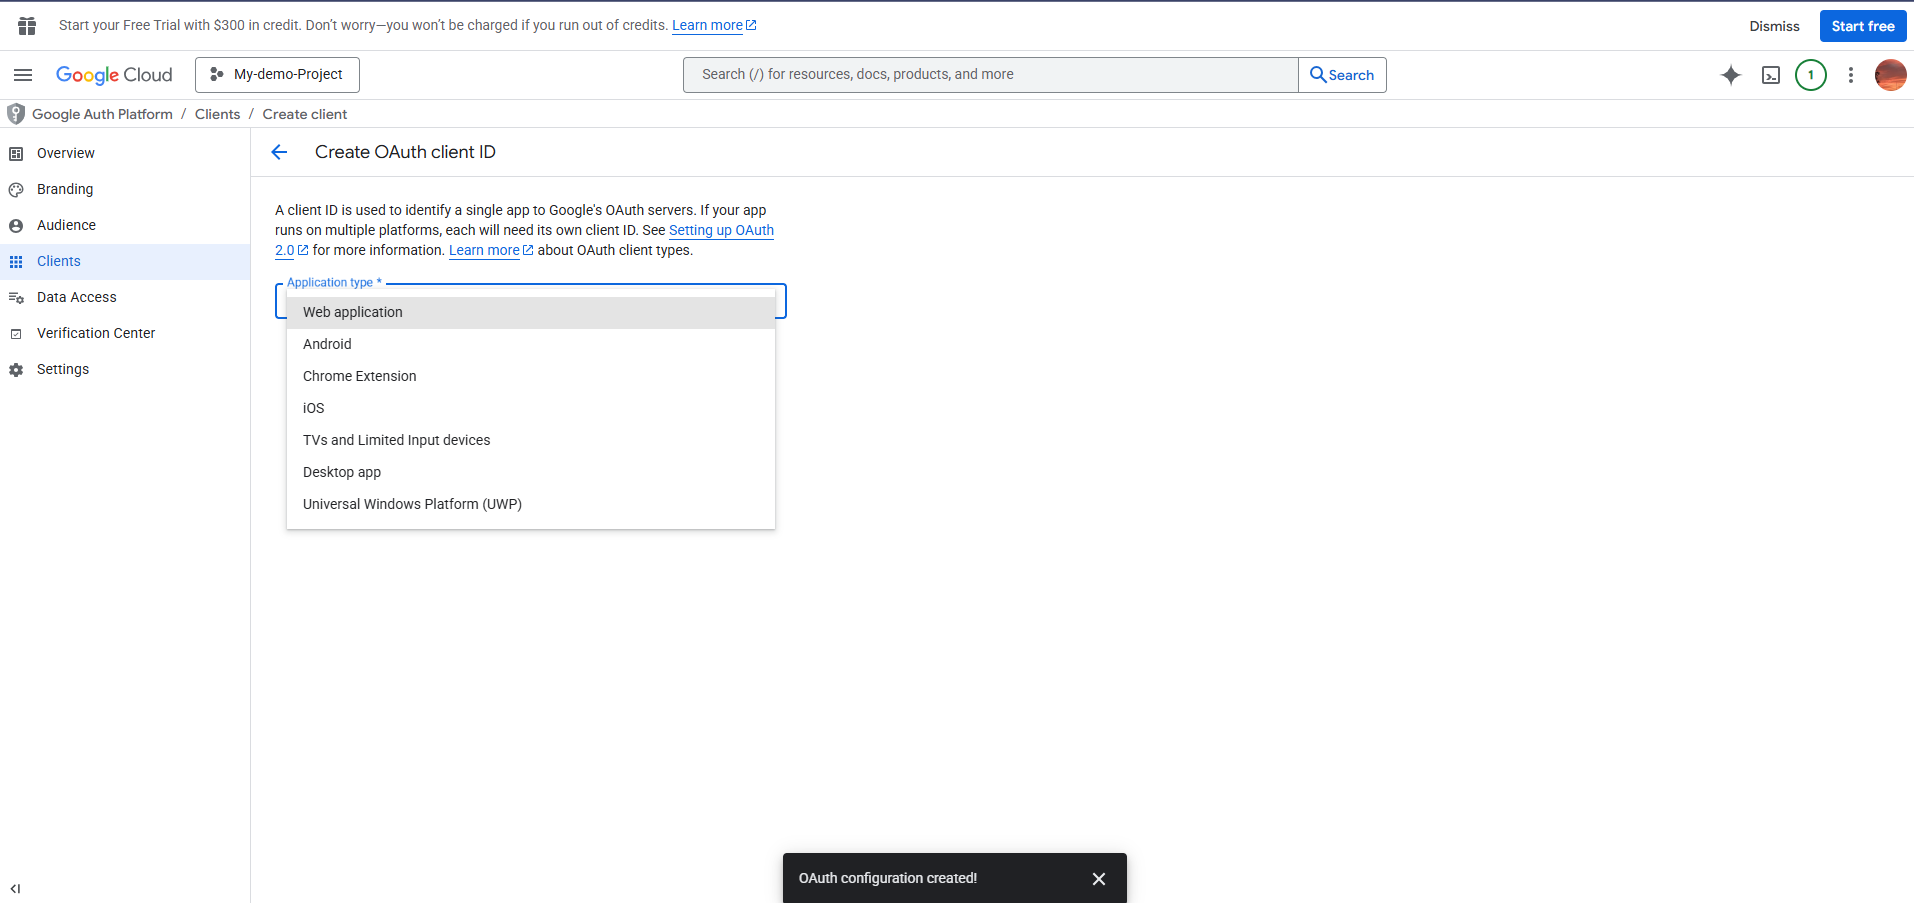
Choose the client type based on your need. Here we used “web application” for our needs.
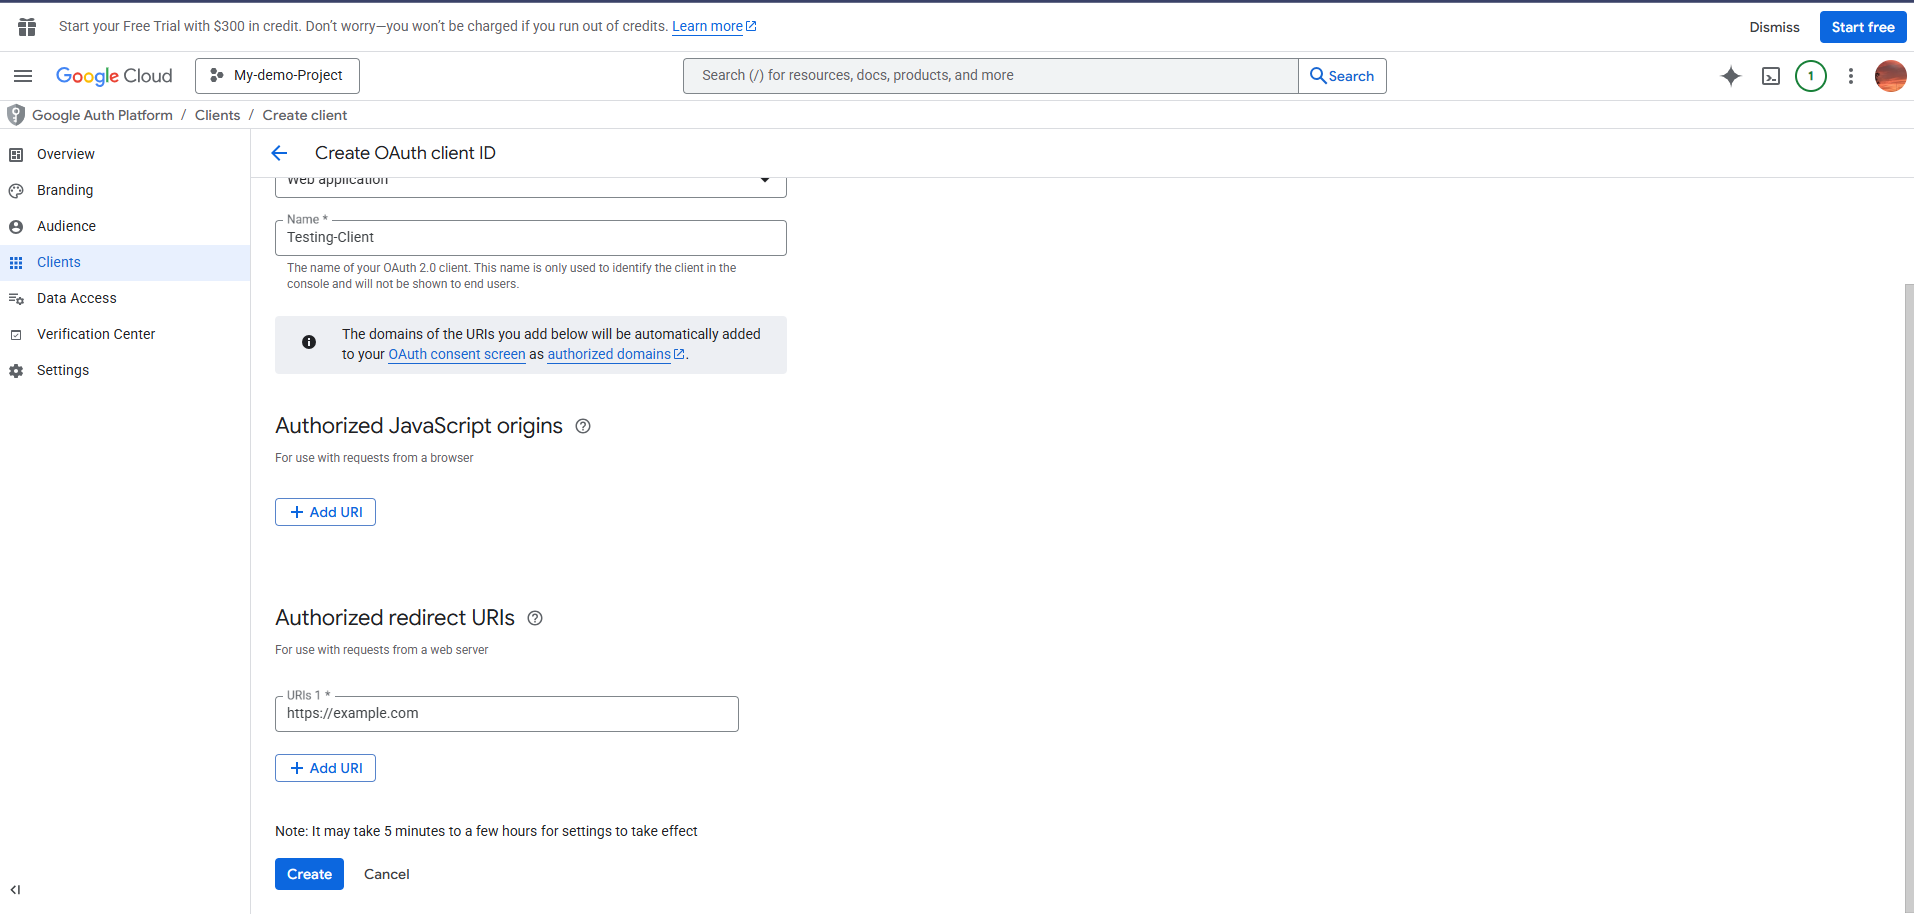
6. Then give a name for a client and add a redirect URI, then click "Create.” The redirect URI should be valid and 'https.’ Your auth code will be sent to this redirect URI only, so give a valid one.
7. The client is created and the file with the client ID and client secret will be created. You can download it and use it for generating an access token later.
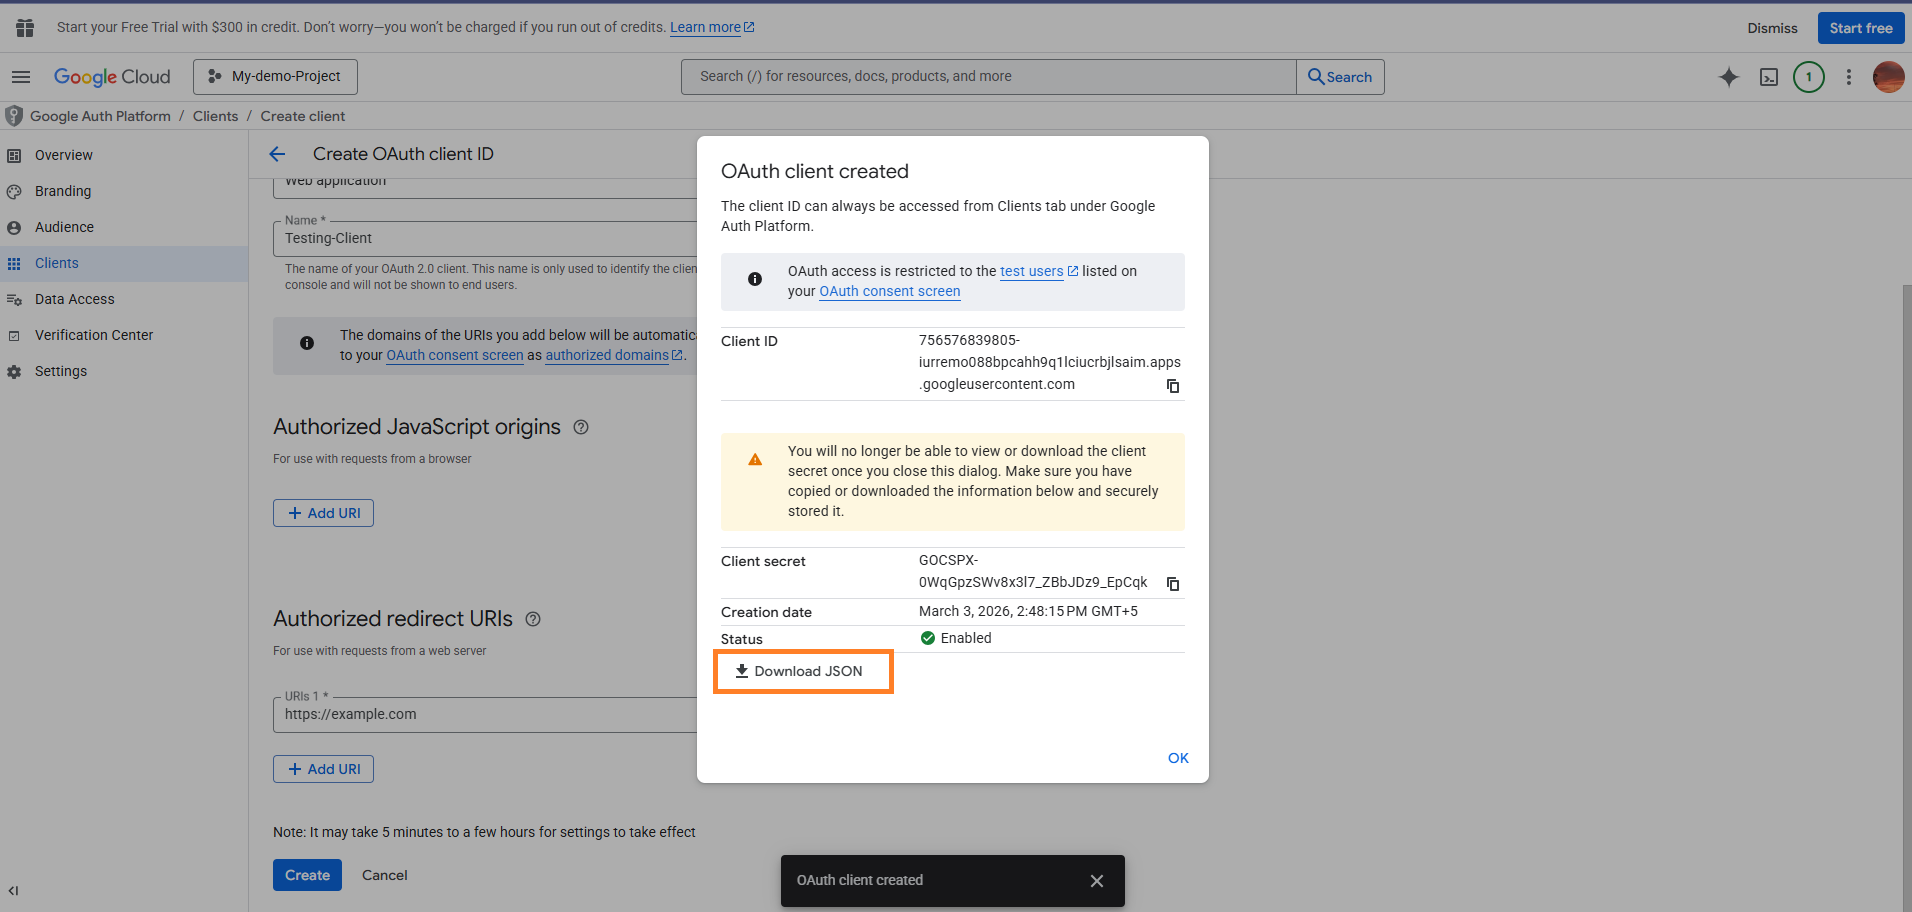
Using these credentials, any live user can get access via authorization.
Enable needed APIs in Google Cloud Console
After completing the OAuth application. We should enable the API we want. It is an important step. Without this, we can’t get data. Here we use this app for Google Analytics and are going to fetch data through the Data API.
1. Select “API and Services.”
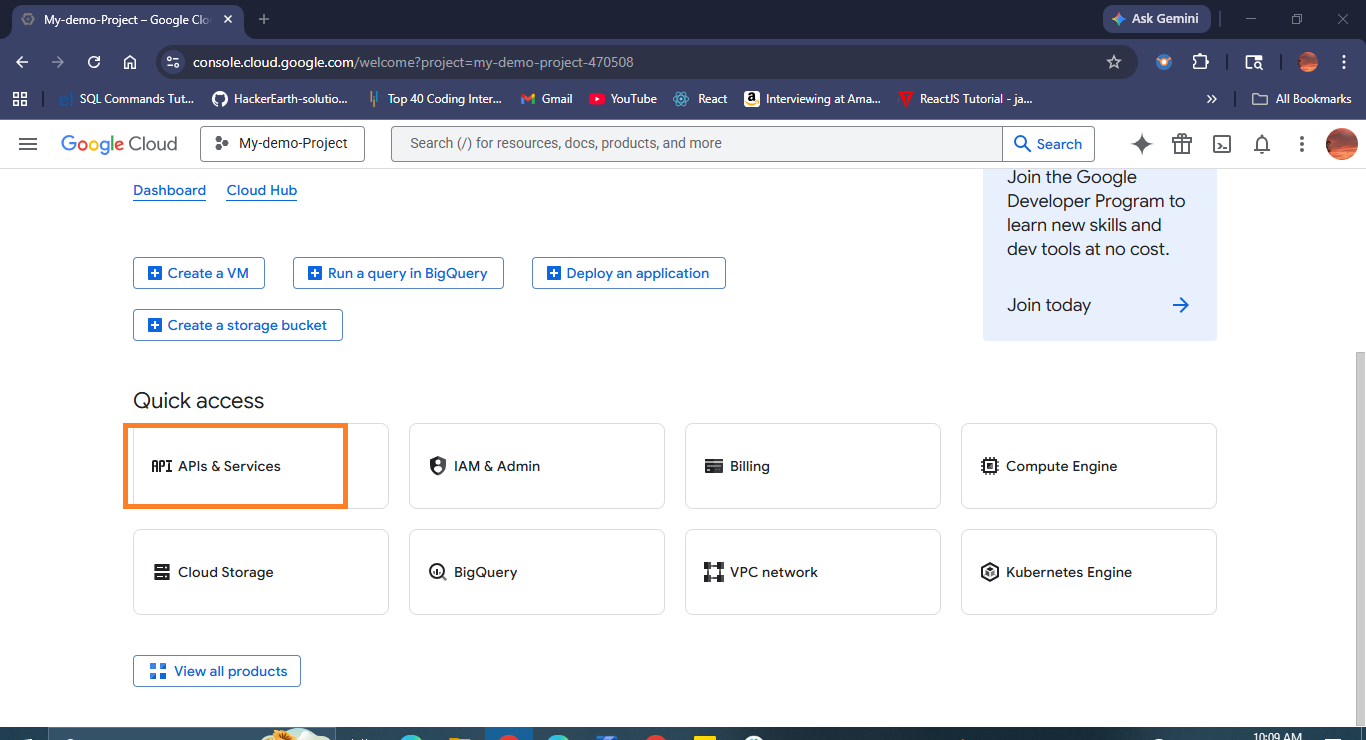
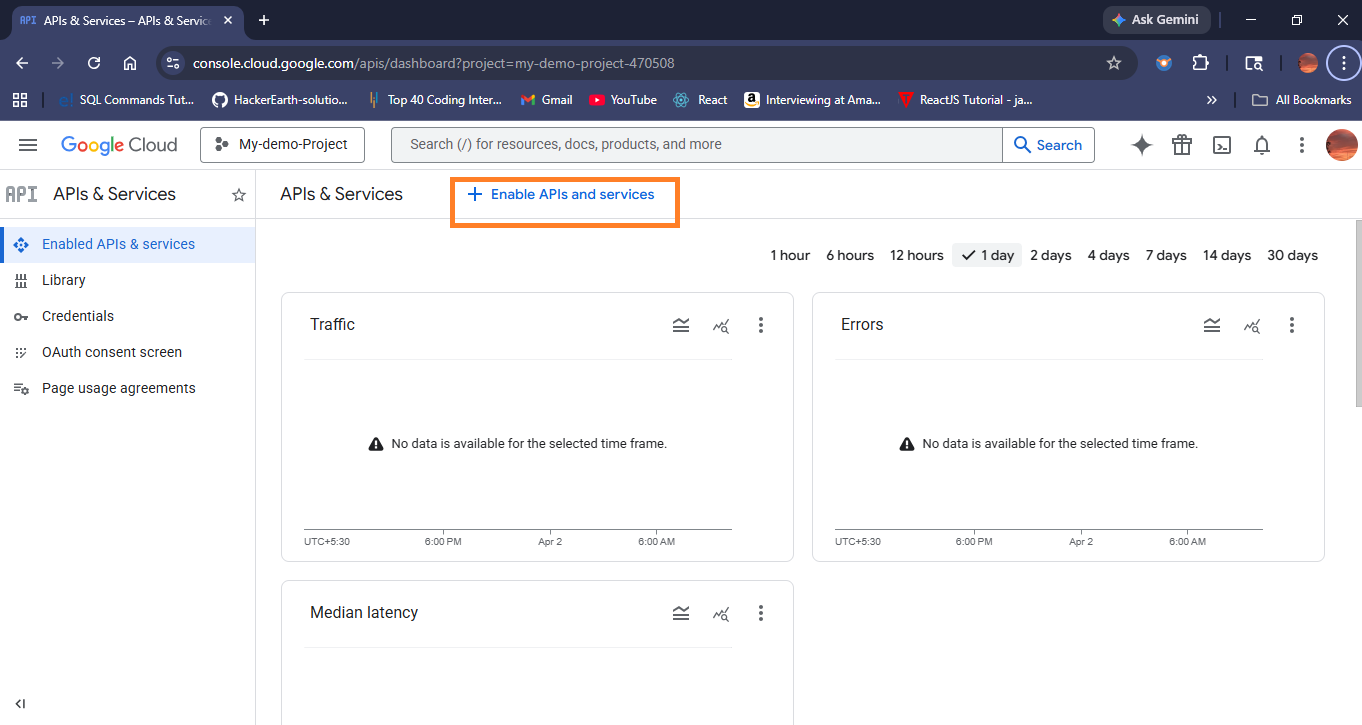
2. Click the “Enable API and Services” button.
3. Type in any APIs you want, and then select and enable them. Here we need the Google Analytics Data API.
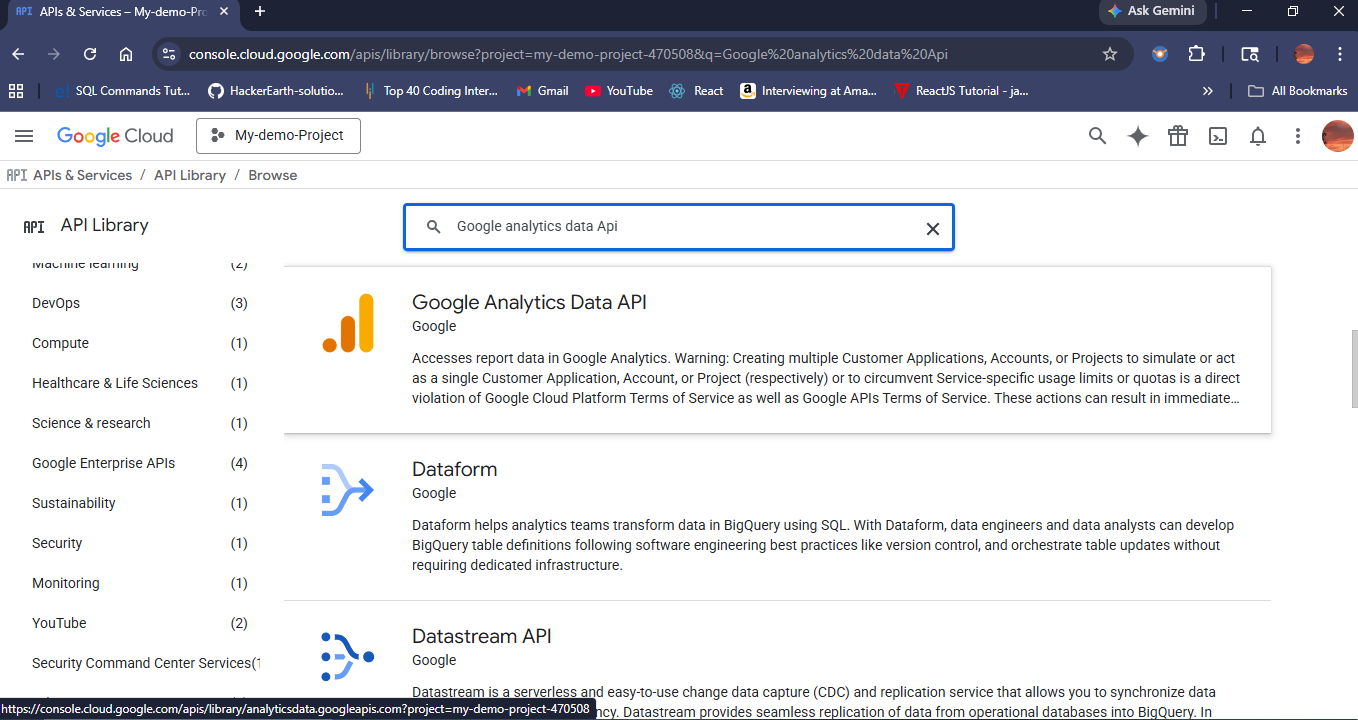
Select Google Analytics Data API and click the “Enable” button
Then the Google Analytics Data API was successfully enabled.
To create an access token by using a client ID and client secret follow the steps below :
For both OAuth methods, these steps will be the same. But for a service account you can’t get a refresh token.
Step 1: Generating a code to authorize the user
Replace your client ID and the redirect URI you added in the OAuth app in the URL parameters below.
Then open the link in the browser. It opens the consent screen in your browser (It's a single line URL).
https://accounts.google.com/o/oauth2/v2/auth?client_id=YOUR_CLIENT_ID&
redirect_uri=YOUR_REDIRECT_URI&response_type=code
&scope=https://www.googleapis.com/auth/analytics.readonly
&access_type=offline&prompt=consent
Choose the account that is linked to the Google Analytics dashboard.
It will ask for a grant. Then click 'Continue.’
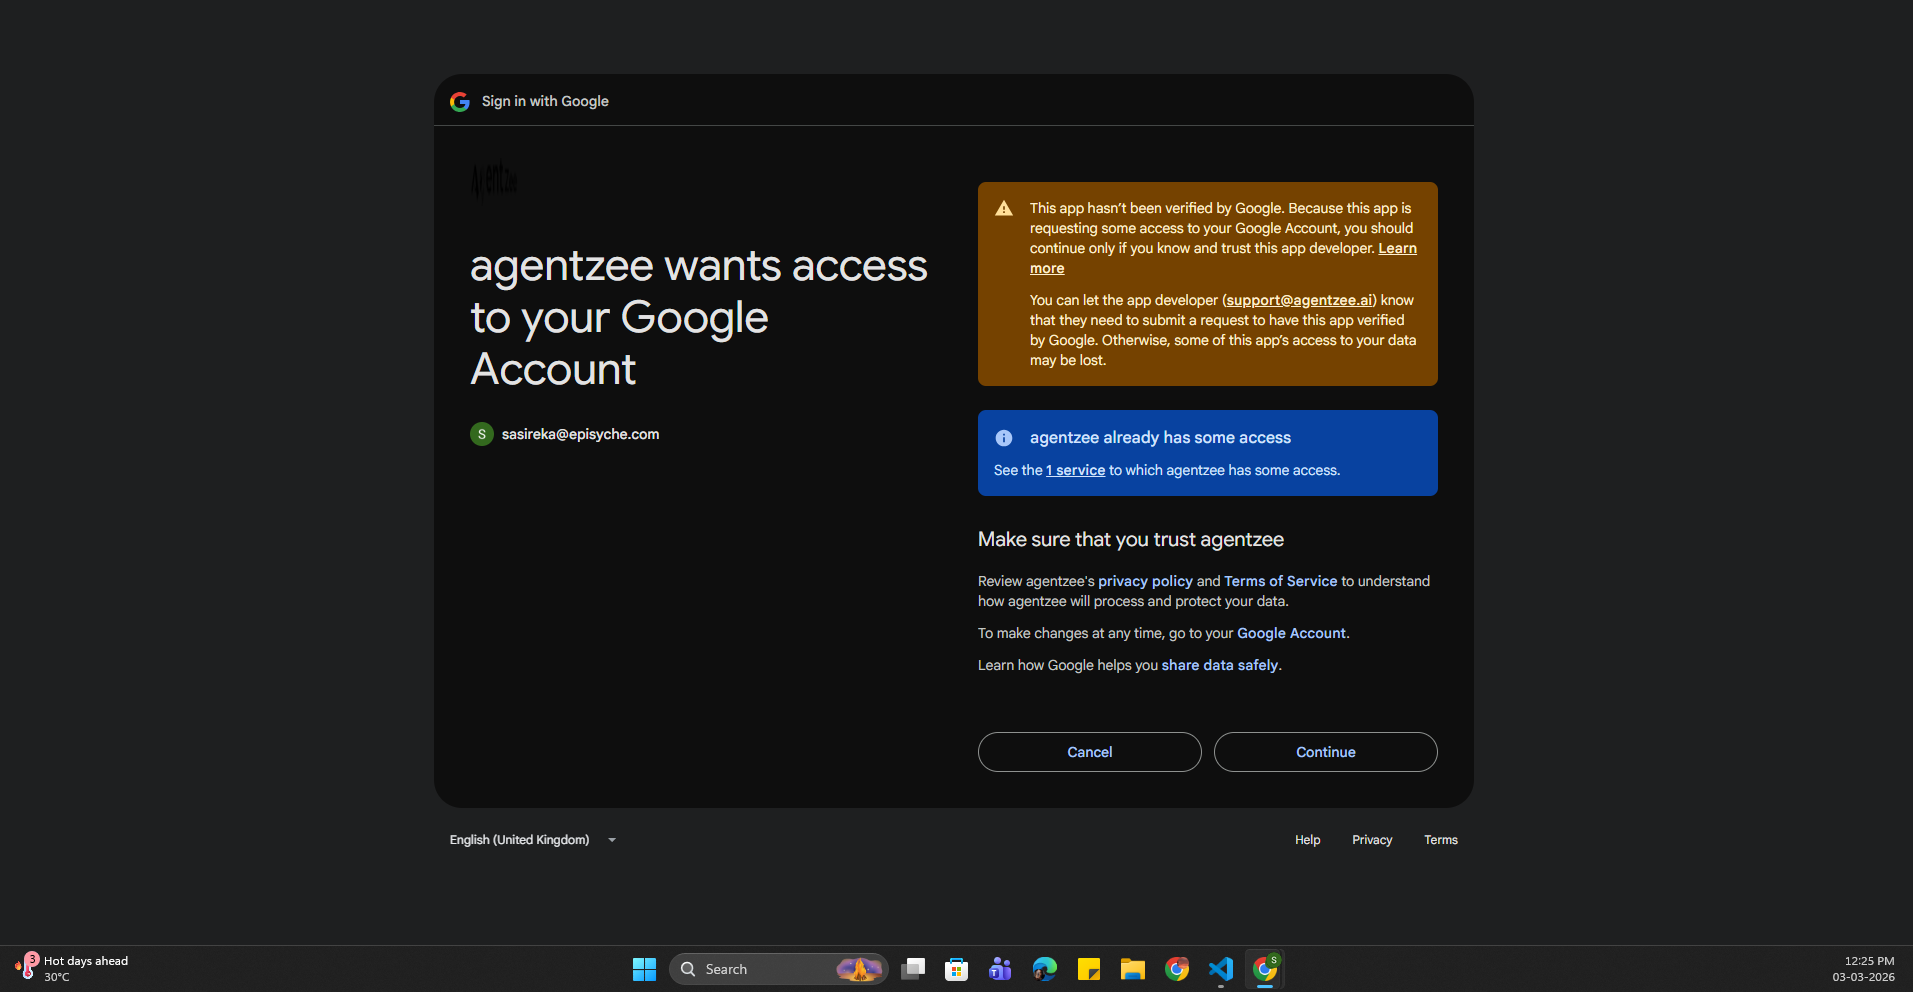
It will redirect you to the callback URI you added in the Google Cloud project.
Then you will get a code
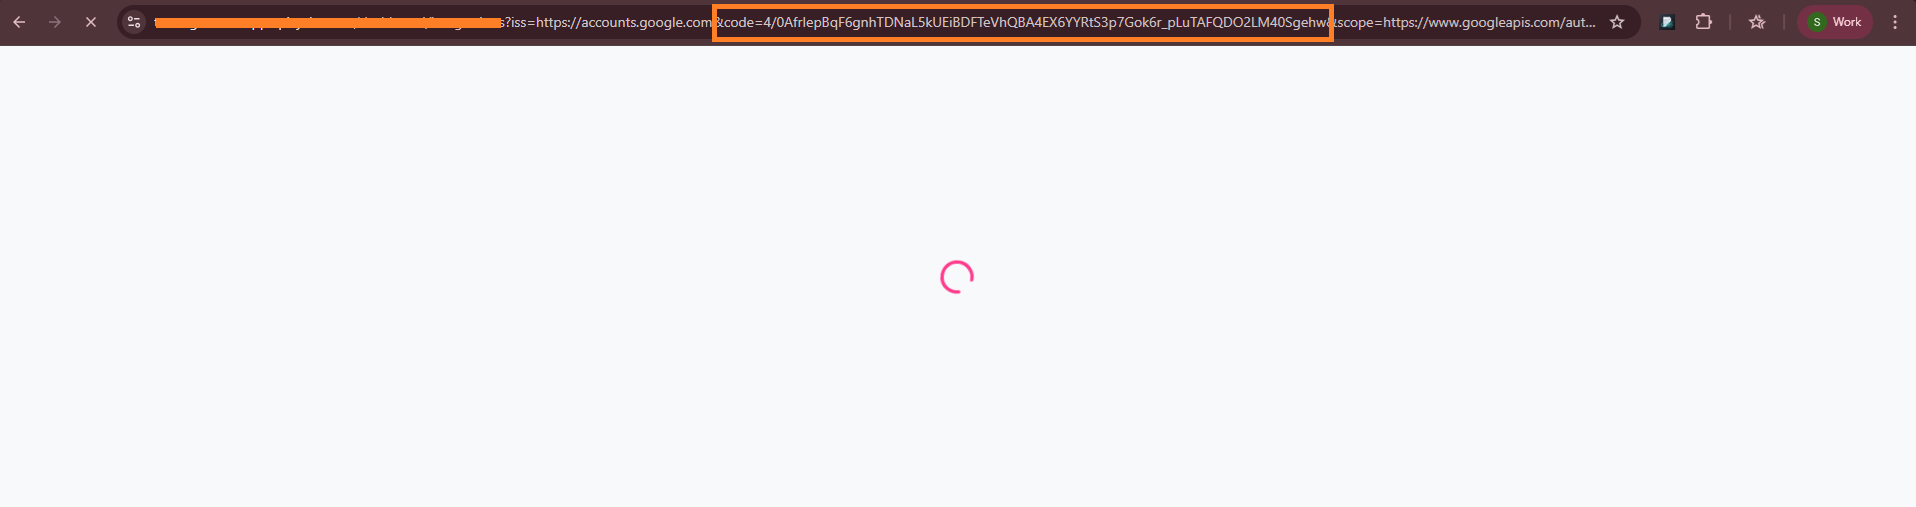
This is the code you have to use to generate an access token.
Step 2: Generate an access token through the API
Now you can use the below curl for the exchange code for an access token.
Replace your code, client ID, client secret, and the same redirect URI to get an access token
curl -X POST https://oauth2.googleapis.com/token \
  -H "Content-Type: application/x-www-form-urlencoded" \
  -d "code=AUTHORIZATION_CODE" \
  -d "client_id=YOUR_CLIENT_ID" \
  -d "client_secret=YOUR_CLIENT_SECRET" \
  -d "redirect_uri=YOUR_REDIRECT_URI" \
  -d "grant_type=authorization_code"
The response will be like
{
"access_token": "ya29.a0AfH6SMA...",
"expires_in": 3599,
"refresh_token": "1//0gdfgsdfg...",
"scope": "https://www.googleapis.com/auth/analytics.readonly",
"token_type": "Bearer"
}
Now you can use this access token for API calls. This access token will be valid for one hour. After that you have to regenerate it using the refresh token.
Step 3: Regenerate an access token using a refresh token
curl -X POST https://oauth2.googleapis.com/token \
  -d client_id=YOUR_CLIENT_ID \
  -d client_secret=YOUR_CLIENT_SECRET \
  -d refresh_token=YOUR_REFRESH_TOKEN \
  -d grant_type=refresh_token
Here replace your client ID, secret, and refresh token to apply for a new access token.